Introduction
The purpose of this integration is to send data from WooCommerce to Salesforce e.g., new/updated customer, payments etc. from WooCommerce to Salesforce and vice versa. Although both WooCommerce and Salesforce provides their APIs so developers can use them for the integration purpose, but we are using Zapier for this integration as it provides inbuilt facility for integrating 2 or more apps.
In the bustling world of digital commerce and customer management, three names echo with transformative power: Salesforce, WooCommerce, and Zapier. Let's embark on a journey of understanding, peeling back the layers of each player in this dynamic trio.
What is Salesforce?
Imagine having a personal assistant, tirelessly organizing your client interactions, schedules, and tasks. That's the essence of Salesforce. It's more than software; it's a robust Customer Relationship Management (CRM) platform designed to simplify and enhance the way businesses connect with their customers.
In the heart of Salesforce lies the ability to track leads, manage opportunities, and foster customer loyalty. It's a digital ally for businesses, offering a centralized hub to nurture and grow client relationships.
What is WooCommerce?
Now, shift your focus to the vibrant world of online retail. WooCommerce, like a reliable backstage crew, steps in to transform a standard website into a dynamic e-commerce stage. This WordPress plugin is the go-to solution for businesses wanting to seamlessly weave their products into the fabric of their online presence.
WooCommerce empowers businesses to create, customize, and manage their online stores effortlessly. From product listings to payment gateways, it's the unsung hero behind many successful online ventures.
What is Zapier?
Enter the conductor of our digital symphony—Zapier. It's the invisible force connecting Salesforce and WooCommerce, orchestrating a harmonious collaboration. But what makes Zapier truly remarkable?
Zapier is the bridge that spans the gap between diverse apps and automates workflows with finesse. It's your digital assistant, ensuring that when something happens in one app, a corresponding action seamlessly follows in another.
In simpler terms, Zapier is the glue that binds your digital ecosystem, making routine tasks feel like a well-choreographed dance.
As we delve into the intricate dance of Salesforce, WooCommerce, and Zapier, remember that this isn't just about software integration. It's about streamlining, simplifying, and enhancing the way you do business in the digital age.
So, fasten your seatbelt as we navigate the vast landscape where these three players converge, creating a symphony of efficiency and seamless collaboration.
Why Zapier?
Zapier is an online automation tool which can connect 2 or more apps without coding or relying on developer. Basically, it automates business processes between 2 or more apps based on some events, in one app.
[add_whitepaper_snippet title="Azure Stack Overview whitepaper"]
Benefits of using Zapier
- No coding and hence no developer required.
- Consistency.
- Visibility.
- It is fast and reliable as it does not require custom coding.
Benefits of Integrating Salesforce and WooCommerce using Zapier: Elevating Your Business Ecosystem
Now that we've uncovered the essence of Salesforce, WooCommerce, and Zapier, let's delve into the tangible advantages of weaving them together into a seamless tapestry.
The integration of Salesforce and WooCommerce via Zapier isn't merely a technical maneuver; it's a strategic move that unlocks a spectrum of benefits.
1. Unified Customer Insights:
Imagine having a 360-degree view of your customers— their preferences, purchase history, and interactions. By integrating Salesforce and WooCommerce, Zapier facilitates the seamless flow of data between these platforms, ensuring that your customer database is always up-to-date.
This unified view empowers your team to make informed decisions, tailor marketing strategies, and provide personalized customer experiences.
2. Streamlined Order Processing:
Efficiency is the heartbeat of successful e-commerce. With the integration in place, orders made on your WooCommerce-powered store effortlessly sync with Salesforce.
This means streamlined order processing, accurate inventory management, and real-time updates. The result?
A well-oiled machine where orders flow seamlessly from the digital storefront to the CRM system, minimizing manual intervention and reducing the risk of errors.
3. Enhanced Marketing Campaigns:
Your marketing efforts gain a dynamic edge when Salesforce and WooCommerce join forces. Zapier enables the creation of intelligent Zaps that trigger marketing actions based on customer interactions.
From creating leads in Salesforce from new WooCommerce orders to sending targeted emails, the integration amplifies your marketing capabilities.
It's not just about reaching your audience; it's about reaching them with the right message at the right time.
4. Real-time Inventory Management:
Maintaining an accurate inventory is the backbone of any successful e-commerce venture. Through Zapier, the integration ensures that changes in your WooCommerce product inventory are instantly reflected in Salesforce.
This real-time synchronization prevents overselling, minimizes stockouts, and provides your team with accurate insights into product availability.
5. Seamless Customer Relationship Management:
Customers expect a seamless experience across every touchpoint. Integrating Salesforce and WooCommerce through Zapier enables a cohesive approach to customer relationship management.
From creating Salesforce accounts and contacts from new WooCommerce customers to updating opportunities based on order status, every interaction is recorded, analyzed, and utilized to enhance the overall customer journey.
6. Increased Operational Efficiency:
Efficiency isn't just about doing things faster; it's about doing them smarter. The integration optimizes operational processes by automating repetitive tasks.
For instance, creating leads, updating opportunities, or sending notifications can be automated, freeing up valuable time for your team to focus on strategic initiatives rather than mundane chores.
7. Scalability and Flexibility:
As your business grows, so do your needs. The Salesforce-WooCommerce integration is designed with scalability in mind. Whether you're handling a handful of orders or experiencing rapid growth, the integration adapts to your business's evolving demands.
This scalability ensures that your digital infrastructure remains robust and responsive to the dynamics of the market.
Also, read: Zoho and Outlook Integration – The Best Practices List
How to integrate Salesforce and WooCommerce using Zapier
Below are the steps for integrating Salesforce with WooCommerce using Zapier: -
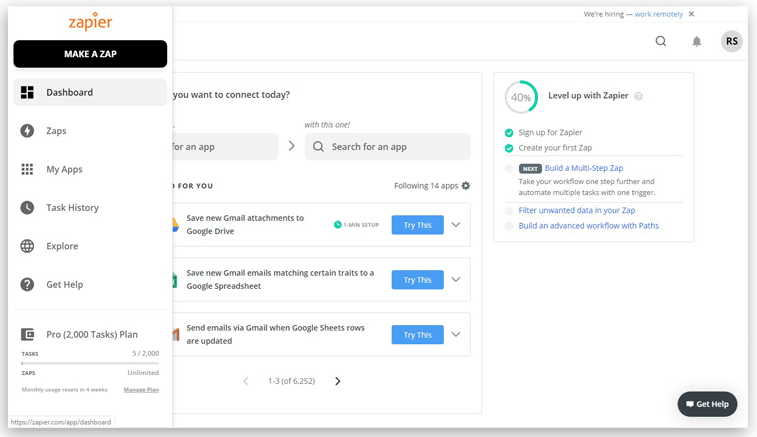
1. Sign in to the Zapier account.
2. Go to Dashboard or you can directly click on “Make a Zap” from the left menu bar.
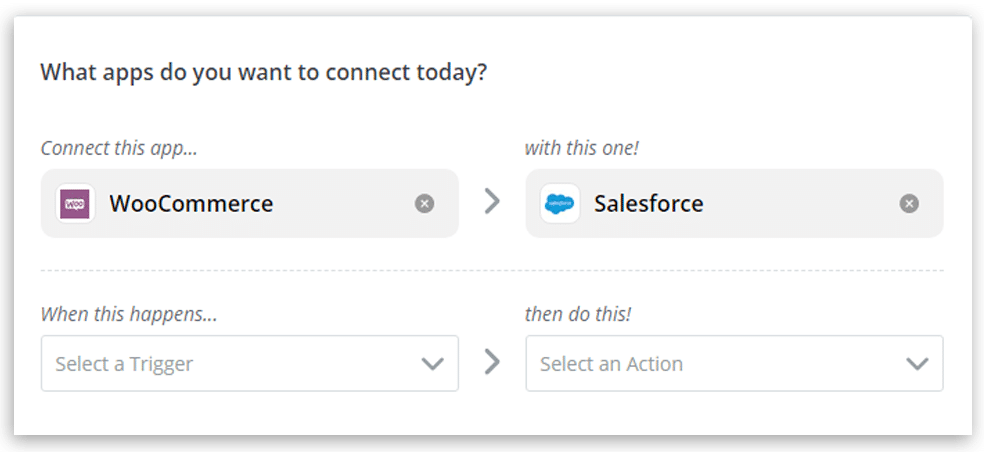
3. Now you will be able to see the below screen, from here you can create the integration process. I have used WooCommerce and Salesforce integration as an example:
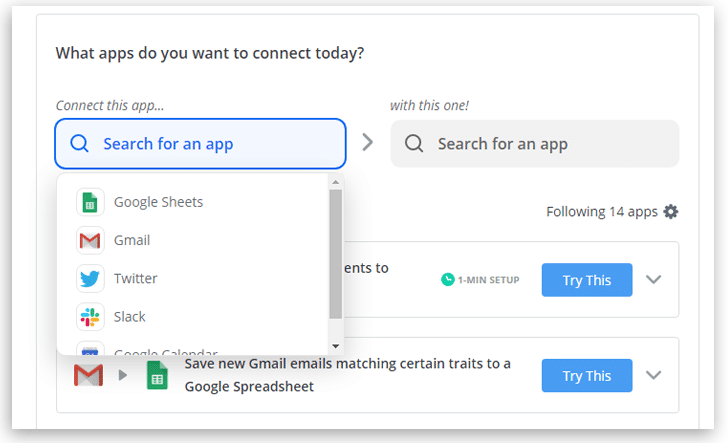
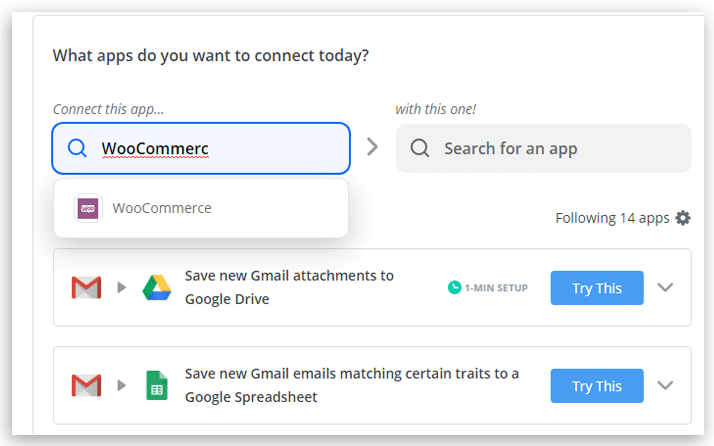
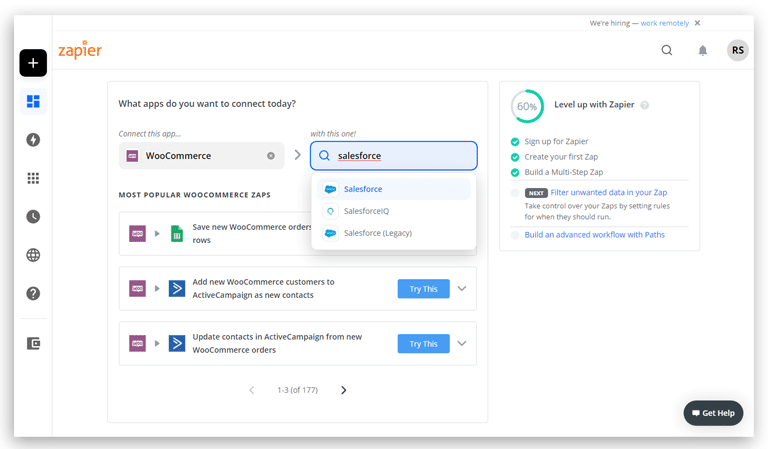
i) Now search for WooCommerce in first search box.
ii) Now search for Salesforce for in second search box, see below image:
there will be 2 options for (as in above image) Salesforce and Salesforce (legacy). Salesforce (Legacy has few extra integration options). Select any of the one.
Also, read: CRM Experts that put your business first – Top hiring strategies
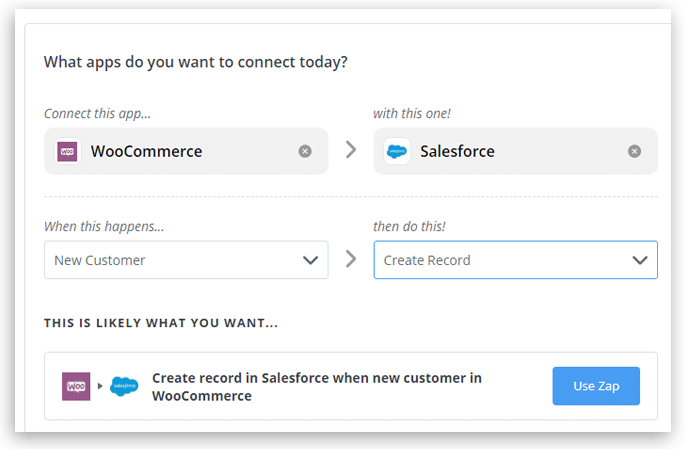
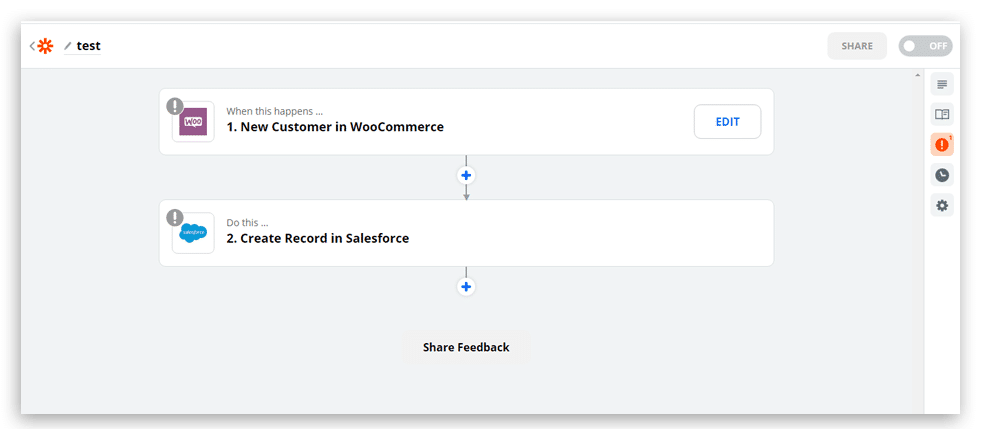
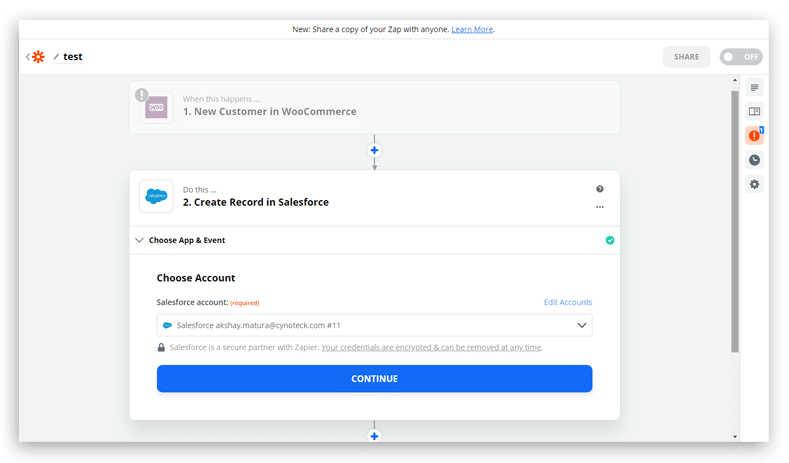
4. Let’s take an example for Created Account automatically in Salesforce whenever a customer is registered in WooCommerce. After selecting source and target by following above steps then we must specify the “When this happens” and “then do this”, refer below image:
a. When this happens: This is the starting point i.e. On what event should our integration need to get fired. Click on the dropdown, select “New Customer” from the available option
b. Then do this: This is the action that our integration will perform. Select “Create Record” from the dropdown.
Also, read: Salesforce vs NetSuite: Pick the right CRM for you
5. Now you will be able to see the Use “Zap button”, see the below image.
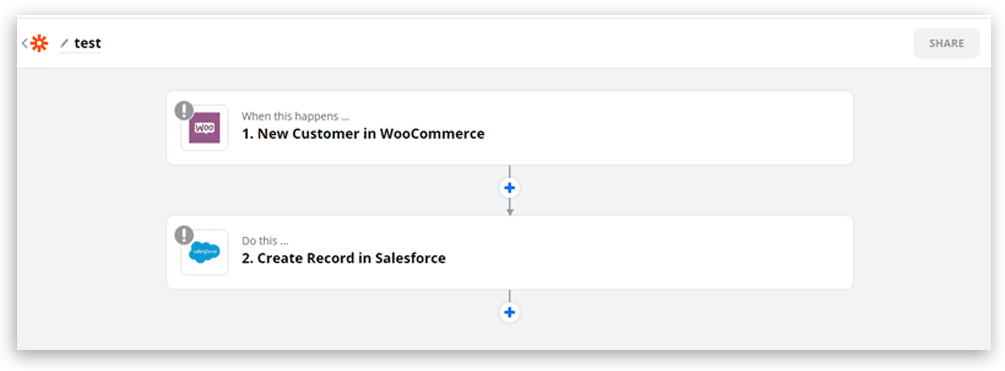
6. Now will be redirected to the new Zap created. You can rename it, I have named it as a test, see below image:
Also, read: Magento PWA Studio – Developing PWAs for your Magento eCommerce Store
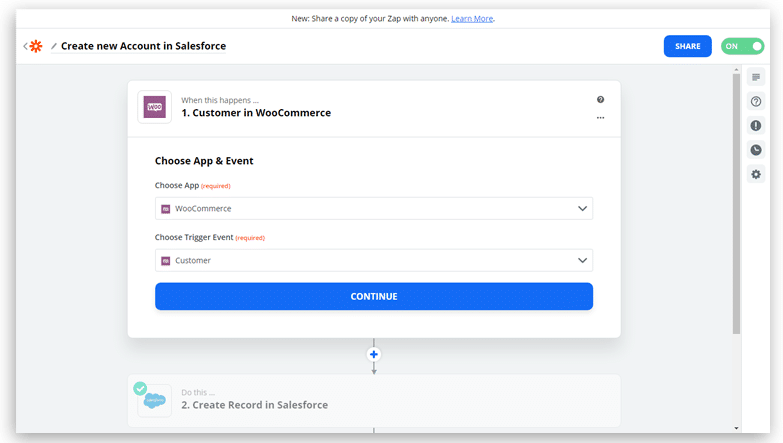
7. Now we must set both WooCommerce and Salesforce here. Let’s start with WooCommerce:
a. When you hover on WooCommerce then you will see a button edit over there. See below image, click on it:
b. After editing you will see the below screen:
There are few steps required for setting up WooCommerce in Zapier
- Choose App & Event: Already selected WooCommerce as App and “Customer” as an event. Click “CONTINUE”.
- Choose Account: Add WooCommerce account here that needs to be synced with Salesforce by entering credentials. This is a one-time login process.
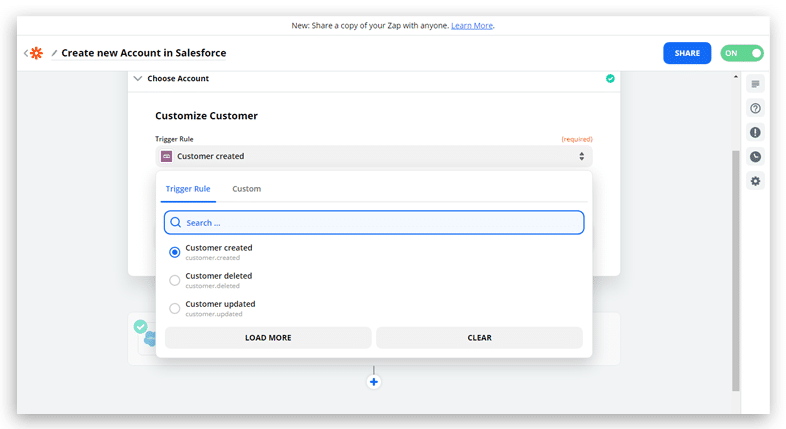
- Select Trigger Rule: This step will be the entry point of integration. Select what trigger is required from the options shown in the below image. In our example, we want to sync new Customers in WooCommerce to Salesforce Account so we will select “Customer Created”. Click Continue.
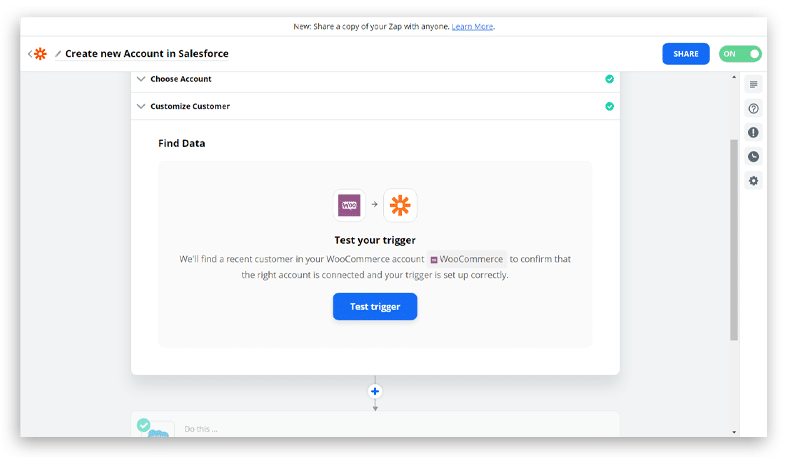
4. Test Trigger: This step is for testing if our WooCommerce account is connected, and trigger is set up correctly. Refer the below image and click on “Test Trigger”.
- Click “Continue” and you are done with setting up the WooCommerce account in Zapier.
- Now we must link our Salesforce instance with Zapier, click on the edit button in the “Do this” section, see below image:
2. From here please select required Salesforce account and environment (Sandbox and production) and click on continue.
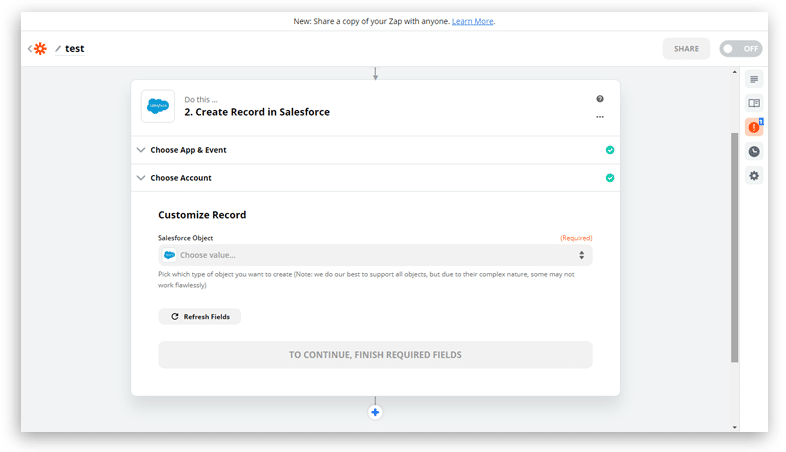
3. Now we must select Salesforce object, select “Account” from the dropdown, see below image:
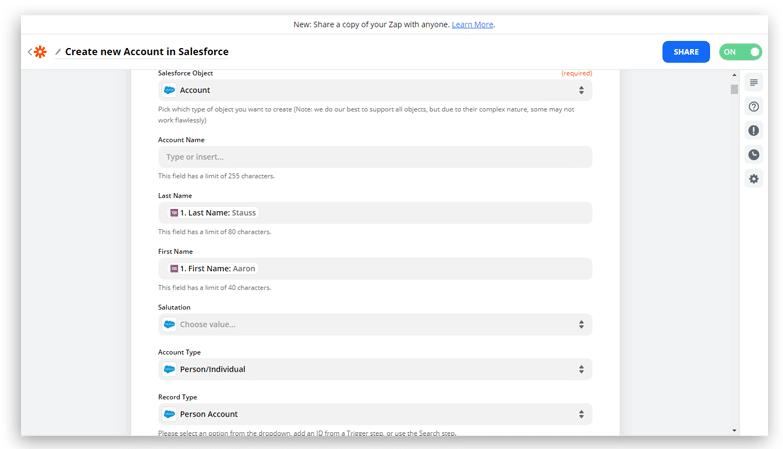
After selecting the object all Account fields will be populated automatically for mapping. Please refer the below image (it is showing few fields).
Tips for Seamless Salesforce-WooCommerce Integration with Zapier: Crafting a Harmonious Digital Symphony
As we navigate the landscape of Salesforce and WooCommerce integration via Zapier, let's not just explore the technical intricacies but also the tips that can turn this integration into a smooth, well-orchestrated symphony. These practical insights are the tuning forks that ensure your digital instruments play in perfect unison.
1. Leverage Zapier's Pre-Built Integrations:
In the vast expanse of Zapier's capabilities, there's a treasure trove of pre-built integrations waiting to be explored. Rather than reinventing the wheel, take advantage of these pre-configured Zaps.
They are crafted with the collective wisdom of the Zapier community, offering a shortcut to efficiency. Think of it as having a well-constructed bridge—why build a new one when a sturdy path already exists?
2. Thoroughly Test Zaps Before Activation:
Picture this scenario: you've meticulously set up your Zaps, excitement bubbling at the prospect of streamlined workflows.
Before you hit the activation switch, take a pause. Testing is the unsung hero of successful integrations.
Create a controlled environment—simulate different scenarios, test various triggers, and ensure that the data flows seamlessly between Salesforce and WooCommerce.
It's not just about avoiding glitches; it's about instilling confidence in the reliability of your integration.
3. Unleash the Power of Filters and Conditions:
Zapier isn't just a conduit; it's a smart conductor. Dive into the world of filters and conditions to create bespoke integrations tailored to your business needs.
Want to trigger specific actions based on order values, customer segments, or product categories? Filters and conditions are your allies. They transform your integration from a linear process into a dynamic, responsive system that adapts to the nuances of your business.
4. Continuous Monitoring for Smooth Operations:
Integration, like any harmonious performance, demands vigilant monitoring. Establish a rhythm of regular checks to ensure that your Zaps are operating smoothly.
Zapier provides a dashboard that offers insights into the performance of your integrations. Stay attuned to any hiccups, address them promptly, and celebrate the moments when your Zaps run seamlessly. It's a continual process of refinement—a symphony that evolves with each note.
Conclusion:
As we draw the curtain on our exploration of Salesforce-WooCommerce integration through the versatile lens of Zapier, it's not merely an end but an invitation to a new beginning in the realm of digital synergy.
In a landscape where efficiency and connectivity reign supreme, Zapier emerges as the unsung hero, a backstage conductor orchestrating the symphony between Salesforce and WooCommerce. The journey we've undertaken isn't just a technical roadmap; it's a testament to the power of integration, simplifying complexities and bridging the gap between diverse ecosystems.
[sc name="salesforce new"]
[add_newsletter]
[add_related_page_diff_contents blog_cat = "salesforce"]