Core Data is a graphical and persistence framework, which is used in Apple devices with operating systems macOS and iOS. Core Data was first introduced in Mac OS X 10.4 Tiger and iOS with iPhone SDK 3.0. It allows data to be organized in a relational entity–attribute model manner, so that it can be serialized into XML, binary, or SQLite stores.
You can utilize Core Data to save your application’s permanent data for offline use, to cache temporary data, and to add undo functionality to your app on a single device.
Core Data automatically reflects your schema to a CloudKit container to sync data across multiple devices in a single iCloud account.
You can specify your data’s types and relationships and develop respective class definitions. Core Data can manage object instances at runtime through Core Data’s Data Model editor.
Core Data has certain disadvantages as it can only store data once entered, which is not like a typical SQL database.
In other words, Core Data keeps an object graph in the memory hence it can only work with records in the memory. You can understand this like, suppose you want to delete or update 100 records, so first you need to load all the records in the memory.
Earlier Core Data had some issues with multithreading, but over the years the improvements in the development of Core Data have made it compatible with multithreading.
Undo and Redo of Individual or Batched Changes
CoreData has this feature of undo and redo. The undo manager tracks down the changes that occur in the data and can roll them back whenever it is needed. This makes the work of the developer way easy.
View Synchronization
CoreData provides table view and collection view which are helpful when you want to synchronize your views and data.
Versioning and Migration
CoreData helps you with versioning your data model and migration of user data with the evolution of the app.
Background Data Tasks
CoreData performs UI-Blocking data tasks, like parsing JSON into objects, but in the background, which further can be cached or stored to reduce server roundtrips.
Also, read: Native Mobile App Development: Pros, Cons, Alternatives, and cost optimization
CURD in swift (Create, Update, Retrieve, Delete)
Let’s create a new project to understand how Core Data works and let’s select “Use Core Data”. You can also add Core Data to your project afterward, but this is easier, as everything will be served to you.
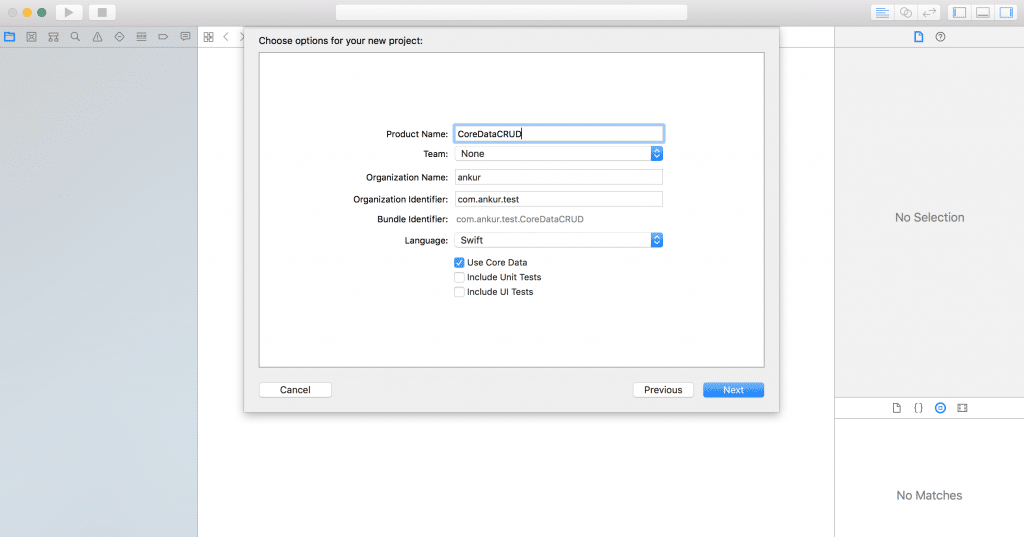
Once the project is created, you will see a file like CoreDataTest.xcdatamodeld already created, you can also add the file to an existing project.
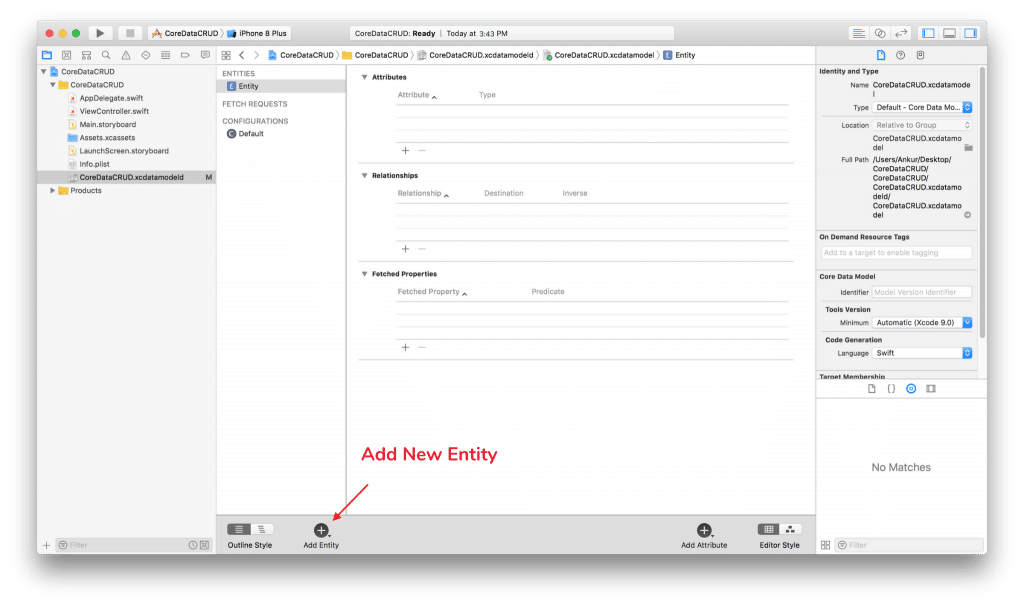
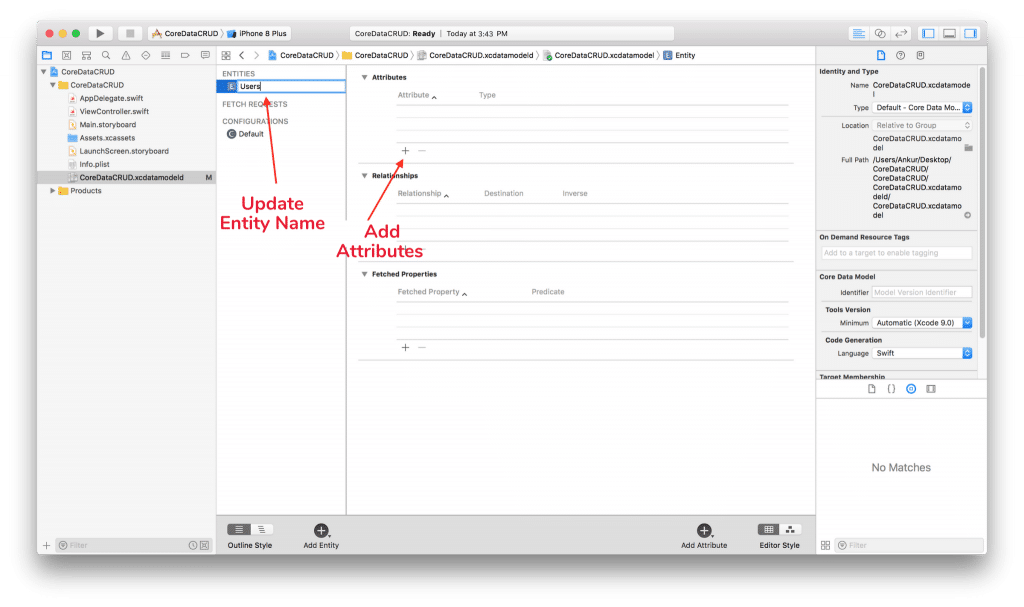
Once you click it, you will see a tool. This tool allows you to configure entities, these entities represent data models.
Here you can define some of the things for each and every entity but remember that Attributes and Relationships will be most important.
Core Data Stack
Inside the AppDelegate, the Core Data Stack code has clear documentation in form of comments, it set up the persistent container and saves the data and if there are any changes then they are saved.
You can easily save and fetch the context from Core Data Stack because AppDelegate is the first file that executes as soon as the app is launched.
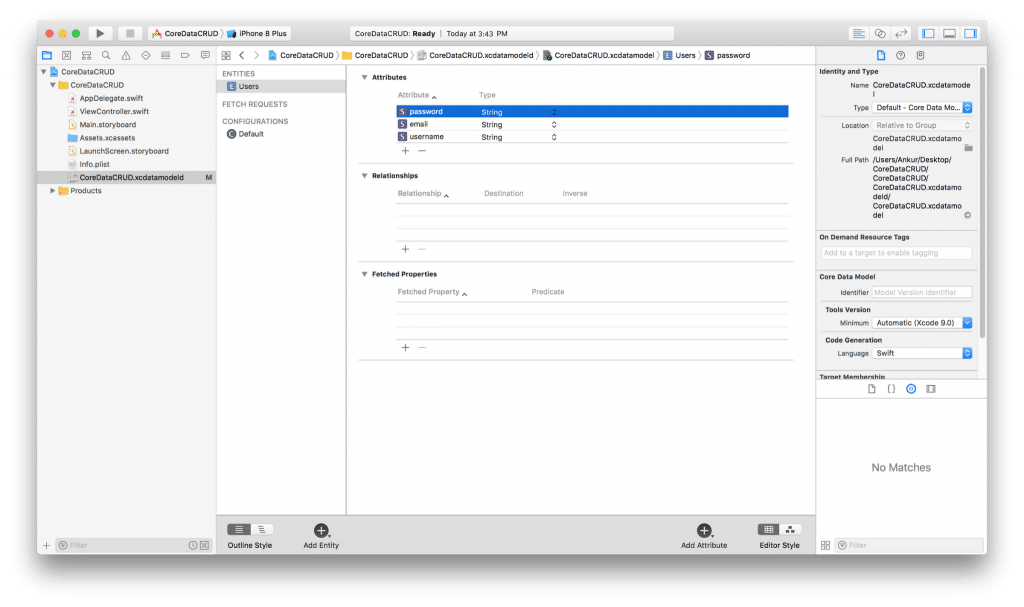
Since you have turned our data in the User entity, now you can add some records and save them into the CoreData.
Also, read: The Guide to Developing and Adopting a Mobile App Strategy for Businesses
Saving Records in Core Data
The procedure of adding the records to Core Data includes the following tasks:
- Refer to persistent container
- Create the context
- Create an entity
- Create new record
- For each key, you need to set values for the records.
Since the container is set up in the AppDelegates. Hence, you need to refer to that container.
let appDelegate = UIApplication.shared.delegate as! AppDelegate
Let’s create a context from this container.
let context = appDelegate.persistentContainer.viewContext
Let’s create an entity and new user records.
let entity = NSEntityDescription.entity(forEntityName: "Users", in: context)
let newUser = NSManagedObject(entity: entity!, insertInto: context)
Finally, add some data to your newly created record.
newUser.setValue("Abhishek", forKey: "username")
newUser.setValue("2311", forKey: "password")
newUser.setValue("21", forKey: "age")
Although the methods which are used to save the context already exist in the AppDelegate.swift, but explicit definition of the code can also be done to save the context in the database. Remember to wrap this with do try and catch block, since it will help in exception handling.
do {
  try context.save()
 } catch {
  print("Error saving")
}
Now, each time you run our app new entities will be added to the records in Core Data.
Also, read: How to outsource mobile app development in 2021: 7 things to keep in mind
Retrieve / Fetching from Core Data
The procedure of fetching the saved data is very straightforward. It has the following task:
- Craft and organize the request of type NSFetchRequest for the entity.
- Use predicate for filter data (if required).
- Fetch the result from the context in the form of an array of [NSManagedObject].
- Now you need to iterate through an array to obtain value for the specific key.
let request = NSFetchRequest<NSFetchRequestResult>(entityName: "Users")
        //request.predicate = NSPredicate(format: "age = %@", "21")
request.returnsObjectsAsFaults = false
do {
            let result = try context.fetch(request)
            for data in result as! [NSManagedObject]
{
    print(data.value(forKey: "username") as! String)
  }

       } catch {

           print("Failed")
}
Update Data in Core Data
To update the records first of all you need to fetch data with the use of predicate as shown above in the Retrieving data process. Then below few steps to follow:
- Frame the request with a predicate for the entity
- Fetch the record, post that Set New value with key
- And Last Save context similar to the Create Data.
For all these tasks you can use the same code above.
Delete Data in Core Data
In order to delete the record first of all you need to find the object which you want to be deleted by FetchRequest, then follow below few steps to delete the record:
- Formulate the request with a predicate for the entity
- Fetch the record which you want to delete
- And create context.delete(object) call (ref image attached below)
let appDel:AppDelegate = (UIApplication.sharedApplication().delegate as AppDelegate)
let context = self.appDel.managedObjectContext!
context.del(data)
do {
try context.save()
}
catch {
    // Handle Error
}
Core Data: NSPredicate In Swift
Predicates are simple tests, which are used to filter out the data which you need in our resultant array of data. The test will be applied to every object in your Core Data entity. Just like simple SQL commands, predicates are used.
let query = "Suraj"

let request: NSFetchRequest<Person> = Person.fetchRequest()request.predicate = NSPredicate(format: "name LIKE %@", query)request.predicate = NSPredicate(format: "name == %@", query)
Just like “LIKE” in the above example, NSPredicate has many keywords such as:
CONTAINS, MATCHES, BEGINS WITH, and ENDS WITH.
Also, read: Flutter Basics: why use Flutter for mobile app development
Conclusion
Core Data is a great fit for applications that require managing a complex object graph. Core Data can only do its charm because it maintains the object graph it works in memory. There are many complicated things that we can do with core data like – adding Predicates and complex relationships of databases, tracking data changes, and more. As you utilize more Core Data and dive in, things get more complicated, but these are the fundamentals of Core Data.
Mobile App Development Services
Do you want to leverage mobile technology for your business? Cynoteck is a one-stop Mobile app Development Services provider. We provide iOS and Android application development services so that you can reach your target audience on any device.