In this article we will sort out a solution to a basic problem of setting the default mode for forms that many developers face when they are using Power Apps to create a form by canvas app.
So, if you are new to Power Apps and create a form using canvas app, in some cases you must have encountered a problem that the form doesn’t show up when you run or test it in the browser itself.
For the article purpose, I have used SharePoint List as a data source, however you can use any data source like Excel, CDS, SQL or any other as per your need.
Steps to create a form and set the default mode
- First open your account at https://make.powerapps.com/ with your Microsoft user credentials for Power Apps.
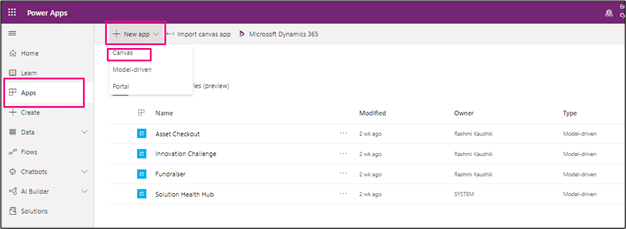
- After you login, select Apps from the navigation menu on the left-hand side. Select Canvas from the +New and from the dropdown select Canvas.
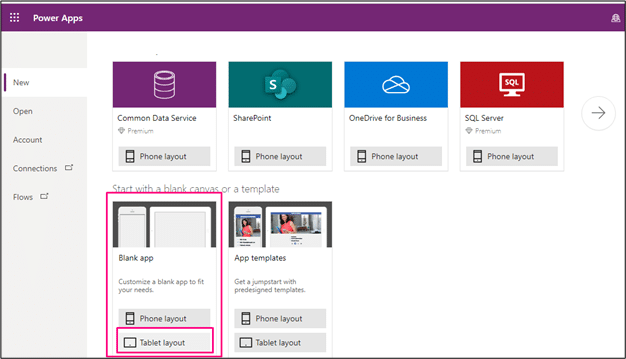
- Thereafter, it will give you many options to create an app from different data sources, I choose Blank app in tablet layout for the demo purpose.
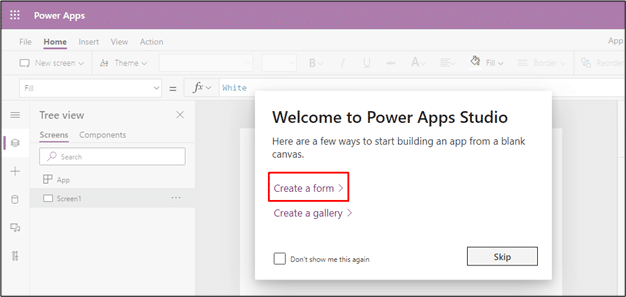
- It opens a Power Apps Studio, select Create a form
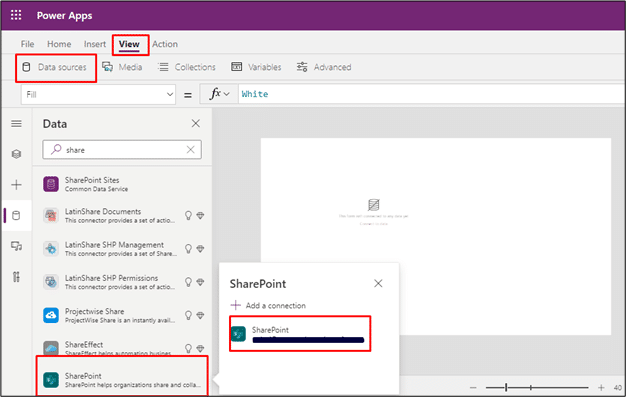
- From the View tab on the top navigation menu, select the Data Sources and connect to your data source from different connectors.
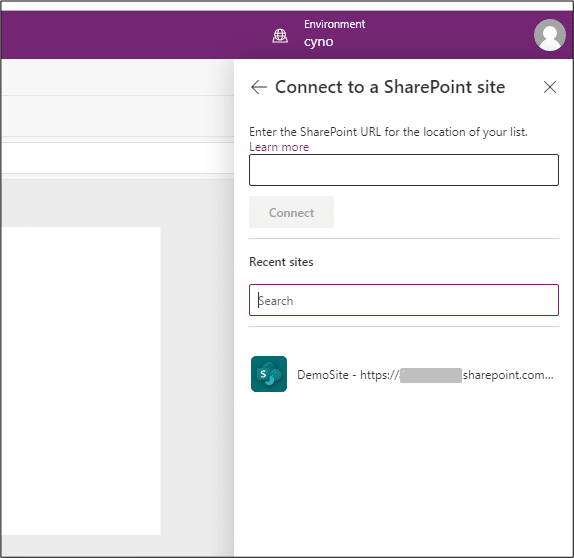
- Either enter the SharePoint URL or select from the given options to link your site
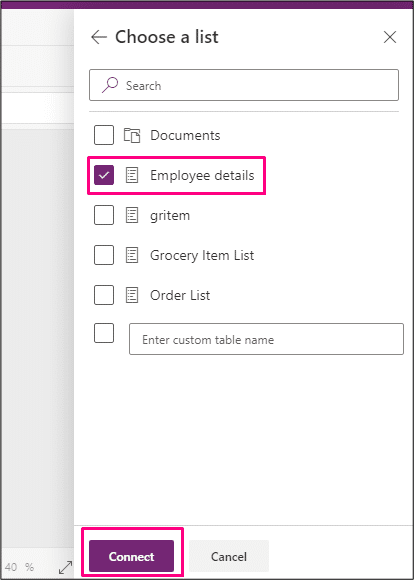
- Select the List and click on Connect
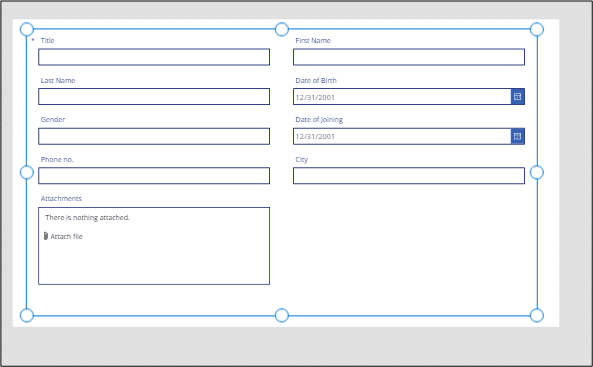
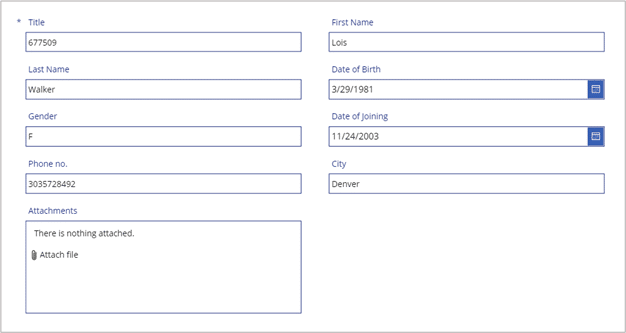
- When the form is connected to a data source, it will be displayed in the Power App Studio as below image
- Click on the Preview button from the top right-hand navigation menu, to see how it works

- You will not be able to see anything on the screen and the blank screen appears with the message “No item to display”

- The form is not visible as the default mode for the form is not set properly.
Also, read: How to create a Power Platform trial?
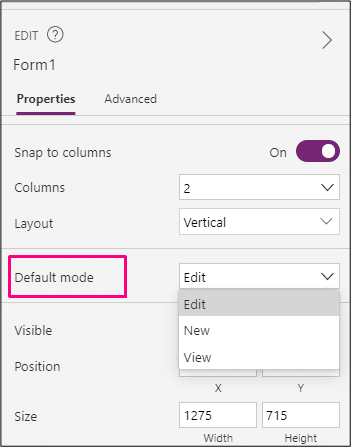
Setting the Default Mode
There are 3 Default Modes for the form and when creating a form using Canvas, it is important to know which mode to be used when. The 3 Default Modes of form are Edit, New, and View.
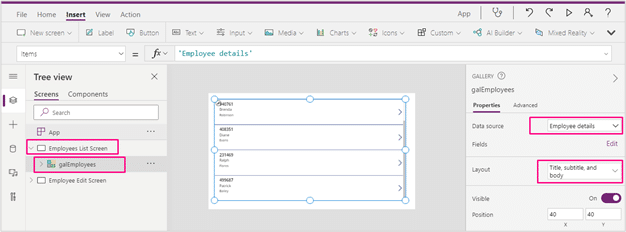
- To understand the default mode in the form, we will add one more screen for Gallery and name it as Employees List Screen. Also connect the gallery with the same data source as the form and name the gallery as galEmployees.
- Rename the screen with form as Employee Edit Screen.
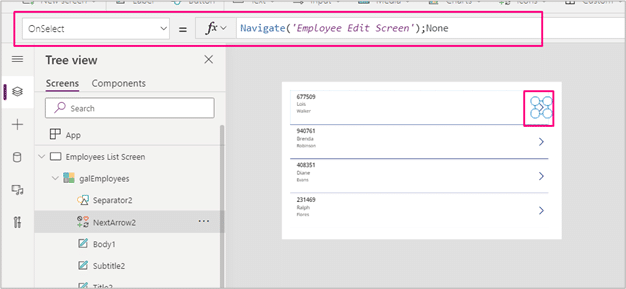
- Click on the pencil icon to edit the gallery. Set the OnSelect property of an arrow to: Navigate(‘Employee Edit Screen’);Transition.None
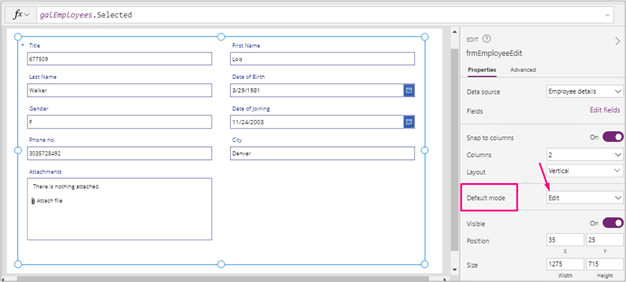
- Now in the Employee Edit screen, rename the form name to frmEmployeeEdit and set the item property to galEmployees.Selected
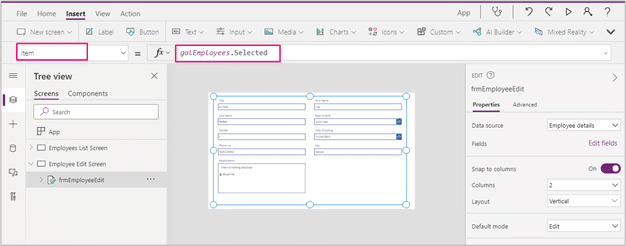
- Although the default mode of the form is same but now if you try to preview the app, you will be able to see the form displayed on the browser with the details of the gallery item selected.
- So, if the Default Mode of the form is set to Edit, it is necessary to pass the value to the form from the item property, typically from the gallery like Gallery.Selected
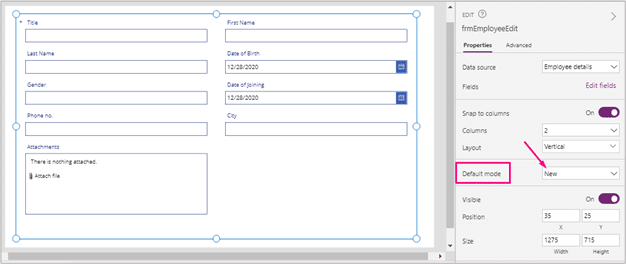
- If you are creating a new form, set the Default Mode to New, otherwise you will experience the same error of blank screen.
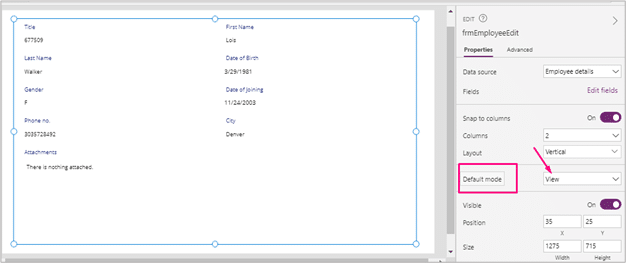
- If you only want to view the content of the form and do not want it to be edited, set the Default Mode of the form to View. In this mode fields will not be visible and the data that appears will be as a result of the row from the gallery or list selected. This is a Read-only view of the form.
Hope this article will be useful to you when you are creating an app using Power Apps. For your suggestions and feedback, please leave comments.
Also, Read: What is Power Apps of Microsoft Power Platform?
Cynoteck is a Microsoft Gold Partner and Power Platform Partner. With our knowledge across the Microsoft Stack, we build solutions that best fit your needs. We help you identify and utilize your organizational data to the best which lets you make intelligent decisions for your growth.
Connect our team if you are interested in implementing Power Platform in your business
Microsoft Power Platform Consulting
Still, have a question? You are free to contact me or other experts in our team to showcase the real power of PowerApps to you.


Salvou a minha vida! Muito obrigado!
Thank you. I was almost giving up.