Vipin Chauhan is currently working as Project Lead at Cynoteck with 19+ years of experience in software development/trainings with great problem solving approach with understanding of project requirements. He is proficient in ASP, ASP.Net, MVC, Web API’s and WCF Services, NodeJS, AngularJS, Dynamics365 and MS Power Platform. He have advance postgraduate degree in Computer Applications, Read More
We are Microsoft Gold partner with its presence across the United States and India. We are a dynamic and professional IT services provider that serves enterprises and startups, helping them meet the challenges of the global economy. We offer services in the area of CRM Consultation and implementation, Application development, Mobile application development, Web development & Offshore Development.
PowerApps integration with Microsoft Dynamics 365 Business Central Online
“PowerApps” is a Cloud Based and “No Code” solution offered by Office 365 platform to create web based and mobile-data-connected apps”
PowerApps is a suite of apps, services, connectors, and data platforms that provides a rapid application development environment to build custom apps for your business needs.
Using PowerApps, you can quickly build custom business apps that connect to your business data stored either in the underlying data platform (Common Data Service for Apps) or in various online and on-premises data sources (SharePoint, Excel, Office 365, Dynamics 365, SQL Server, and so on).
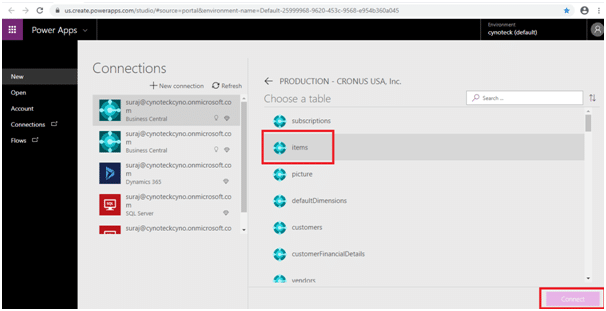
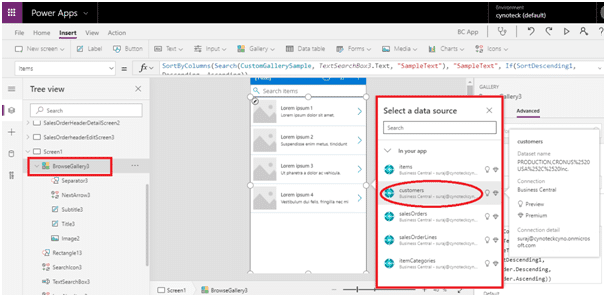
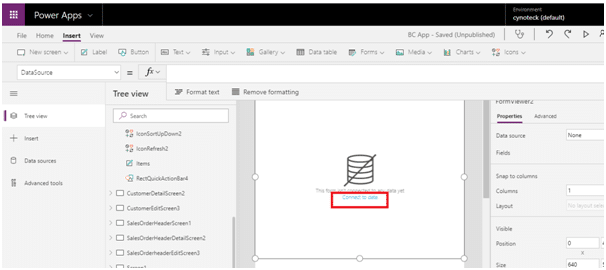
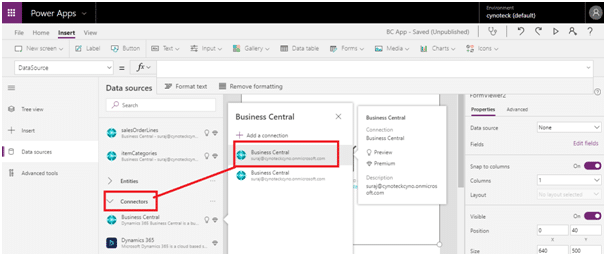
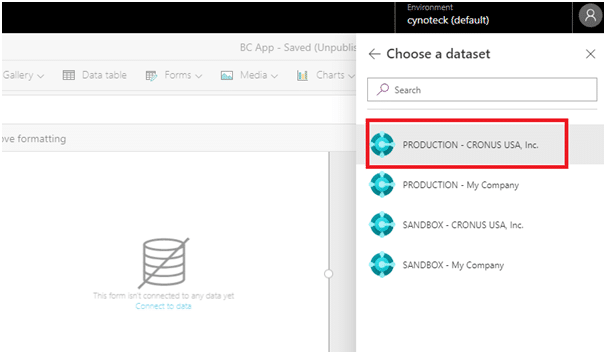
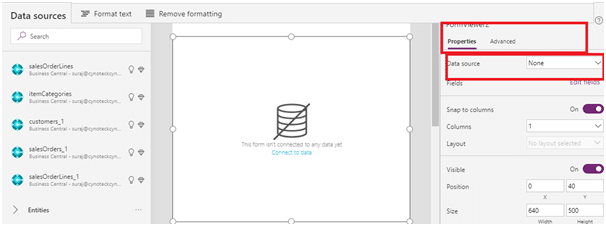
Step 15: Now connect your screen with the data source and choose a dataset and table. Click the form of detail screen and then select Connect to data option.
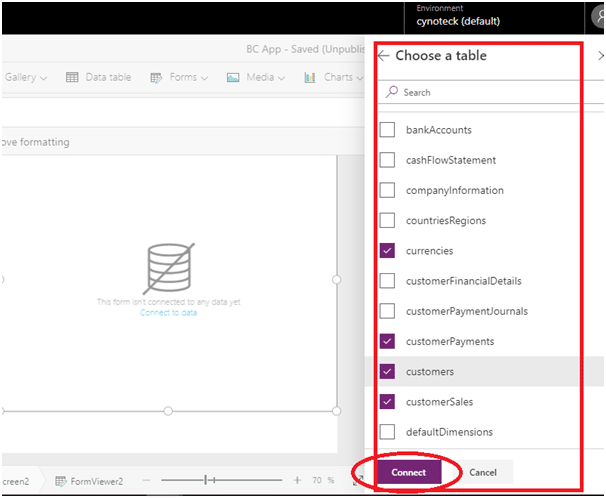
Step 16: You can select multiple tables according to your requirement or need.
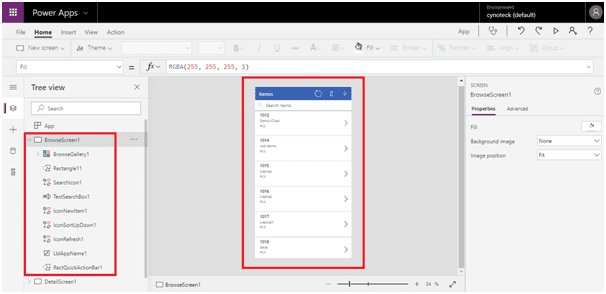
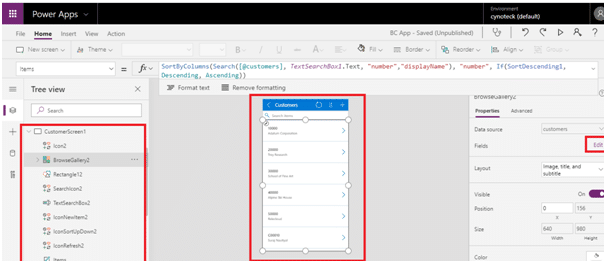
Step 17:Now you can select data source from form property
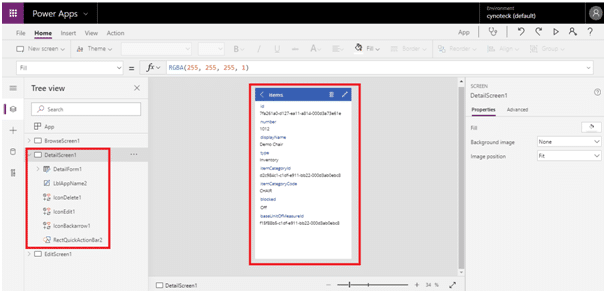
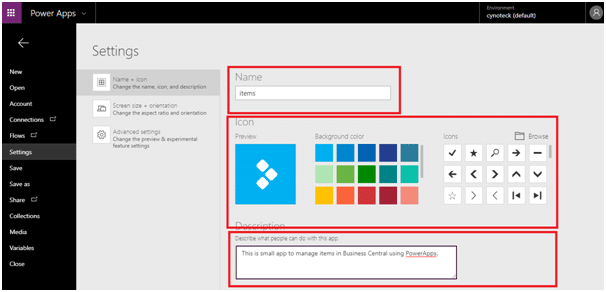
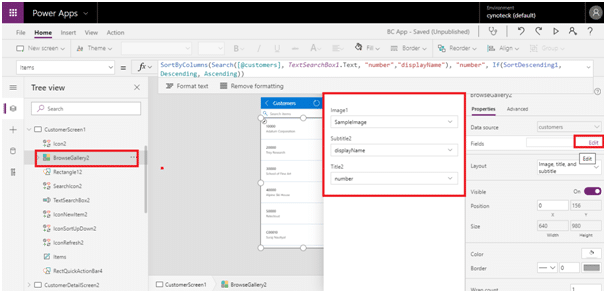
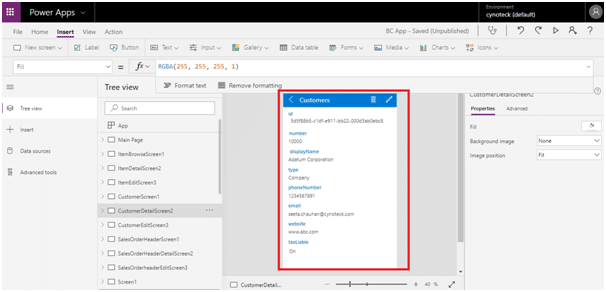
Step 18: You can customize detail form according to your need.
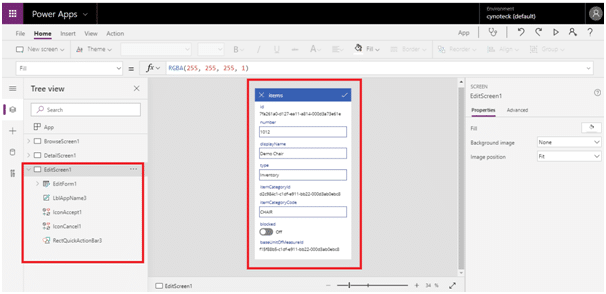
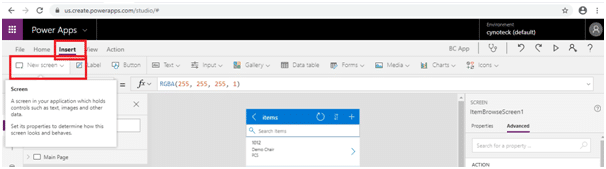
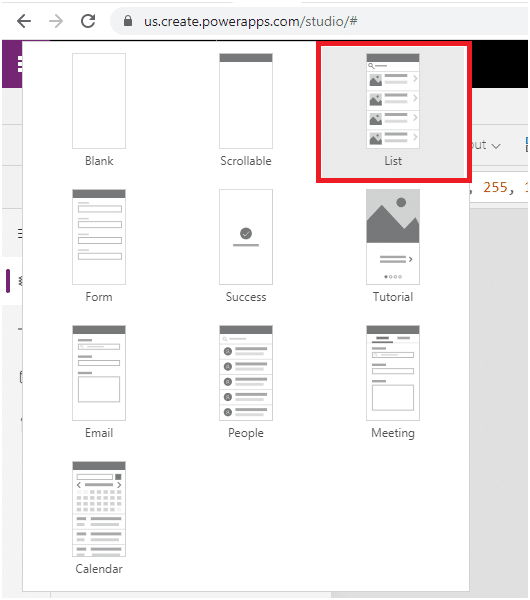
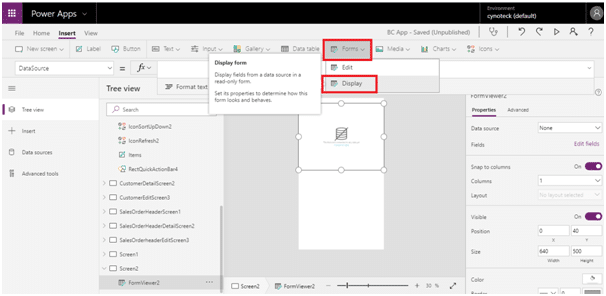
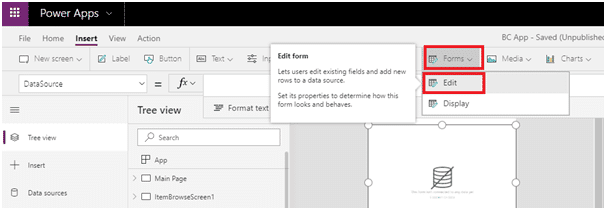
Step 19: Select blank screen from Insert -> new Screen for Edit screen.
Step 20: Select Insert -> forms ->Edit
Conclusion
In wrapping up our journey into the world of PowerApps integration with Microsoft Dynamics 365 Business Central Online, we've unveiled a fusion of digital magic that has the potential to transform the way businesses operate.
The synergy between PowerApps and Dynamics 365 Business Central Online isn't just a technical rendezvous: it's a strategic alliance that's akin to merging a superhighway with a sleek sports car. It's about leveraging the customizable, low code wonder of PowerApps to tap into the robust data and operational prowess of Dynamics 365 Business Central Online.
As a web developer, I've witnessed firsthand the immense power this integration brings. The ability to streamline operations, create custom apps, and harmonize data flow between these two platforms is a game-changer for businesses seeking efficiency and flexibility.
The beauty lies in the seamless marriage of these two platforms. With PowerApps as the creative canvas and Dynamics 365 Business Central Online as the engine room, businesses can craft tailored solutions that align perfectly with their operational needs.
So, my advice? Explore, experiment, and leverage this dynamic duo to sculpt solutions that elevate your business efficiency. The potential lies not just in the tools but in the inventive ways you merge them to sculpt a digital landscape that aligns flawlessly with your business vision.
The journey doesn't end here; it's just the beginning. With PowerApps and Dynamics 365 Business Central Online as your allies, you're equipped to unlock a world of possibilities and efficiency. It's not just integration; it's the cornerstone of a smarter, more agile, and data-driven business world. Here's to an integrated future filled with limitless innovation and streamlined operations!
“PowerApps” is a Cloud Based and “No Code” solution offered by Office 365 platform to create web based and mobile-data-connected apps”
PowerApps is a suite of apps, services, connectors, and data platforms that provides a rapid application development environment to build custom apps for your business needs.
Using PowerApps, you can quickly build custom business apps that connect to your business data stored either in the underlying data platform (Common Data Service for Apps) or in various online and on-premises data sources (SharePoint, Excel, Office 365, Dynamics 365, SQL Server, and so on).
Step 15: Now connect your screen with the data source and choose a dataset and table. Click the form of detail screen and then select Connect to data option.
Step 16: You can select multiple tables according to your requirement or need.
Step 17:Now you can select data source from form property
Step 18: You can customize detail form according to your need.
Step 19: Select blank screen from Insert -> new Screen for Edit screen.
Step 20: Select Insert -> forms ->Edit
Conclusion
In wrapping up our journey into the world of PowerApps integration with Microsoft Dynamics 365 Business Central Online, we’ve unveiled a fusion of digital magic that has the potential to transform the way businesses operate.
The synergy between PowerApps and Dynamics 365 Business Central Online isn’t just a technical rendezvous: it’s a strategic alliance that’s akin to merging a superhighway with a sleek sports car. It’s about leveraging the customizable, low code wonder of PowerApps to tap into the robust data and operational prowess of Dynamics 365 Business Central Online.
As a web developer, I’ve witnessed firsthand the immense power this integration brings. The ability to streamline operations, create custom apps, and harmonize data flow between these two platforms is a game-changer for businesses seeking efficiency and flexibility.
The beauty lies in the seamless marriage of these two platforms. With PowerApps as the creative canvas and Dynamics 365 Business Central Online as the engine room, businesses can craft tailored solutions that align perfectly with their operational needs.
So, my advice? Explore, experiment, and leverage this dynamic duo to sculpt solutions that elevate your business efficiency. The potential lies not just in the tools but in the inventive ways you merge them to sculpt a digital landscape that aligns flawlessly with your business vision.
The journey doesn’t end here; it’s just the beginning. With PowerApps and Dynamics 365 Business Central Online as your allies, you’re equipped to unlock a world of possibilities and efficiency. It’s not just integration; it’s the cornerstone of a smarter, more agile, and data-driven business world. Here’s to an integrated future filled with limitless innovation and streamlined operations!