“Nothing can withstand the power of the human will if it is willing to stake its very existence to the extent of its purpose.” - Benjamin Disraeli. I am Rashmi Kaushik, working as a blogger, Software Consultant and Subject Matter Expert in Cynoteck Technology Solutions Ltd.. Although, I did my graduation and post graduation in Read More
We are Microsoft Gold partner with its presence across the United States and India. We are a dynamic and professional IT services provider that serves enterprises and startups, helping them meet the challenges of the global economy. We offer services in the area of CRM Consultation and implementation, Application development, Mobile application development, Web development & Offshore Development.
Implement multilevel cascading dropdown in Power Apps from SharePoint
Power Apps is a low-code platform used to build custom applications that can work across all devices whether mobile, tablet, laptop or desktop. The drag and drop functionality, ease of customization, full control on labels, and seamless integration with more than 200+ connectors make Power Apps a preferred choice amongst developers. However, implementing some functionality within Power App can sometimes be challenging. In this article, we will be discussing one of the challenges of implementing multilevel cascading dropdown in Power Apps from SharePoint.
In this post, we will learn how to implement multilevel cascading dropdown in Power Apps with no steps skipped.
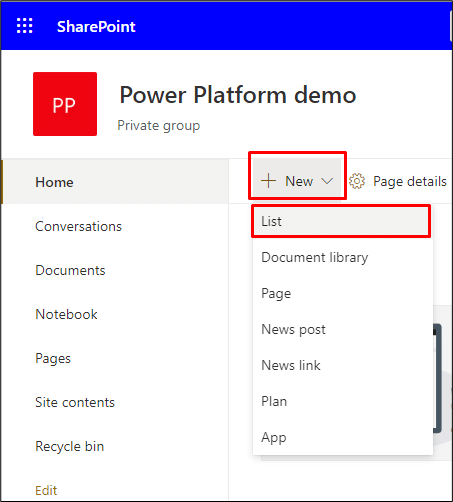
Create List from the SharePoint
In the SharePoint create two new list and name them “Data List” and “Main List”.
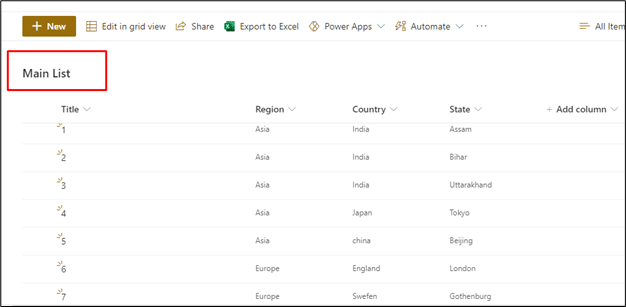
Populate the Main List with items of Region, Country and State.
Create an app
Login with your credentials in Power Apps Studio to create an app and select the layout of your choice in blank app.
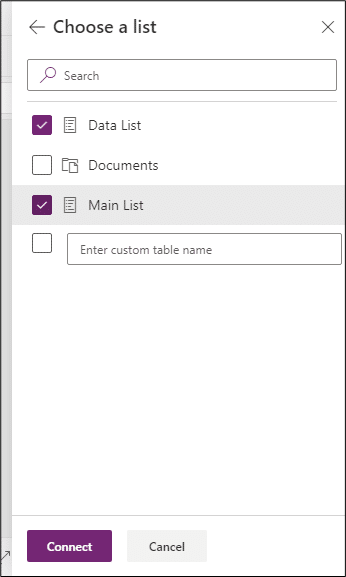
Connect to data sources
In the top navigation bar select View tab and click on data sources. Connect your app with Main List and Data List.
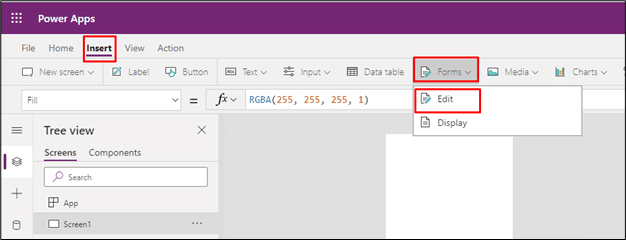
Create a form
Now select Insert tab from the top navigation bar and select Forms from the ribbon.
In the right-hand side under properties, select Data List in Data source
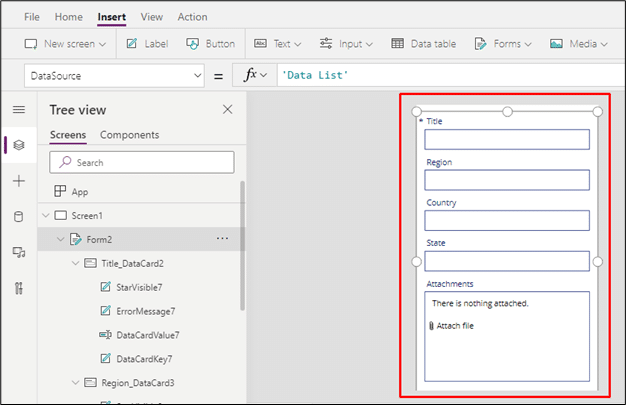
After the data source is connected the form will be displayed on the screen with Title, Region, Country, State and Attachments fields like below.
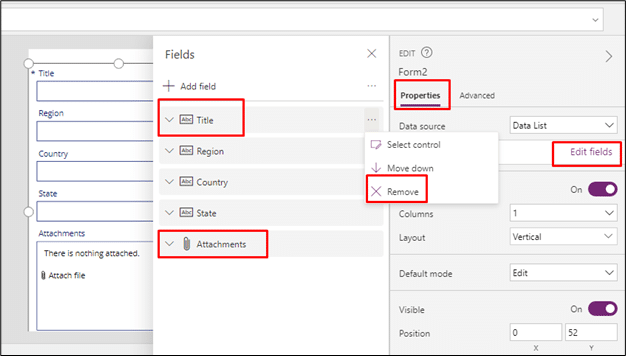
Remove the fields from right hand side under properties tab by clicking on Edit fields that we do not require for this article like Title and Attachments.
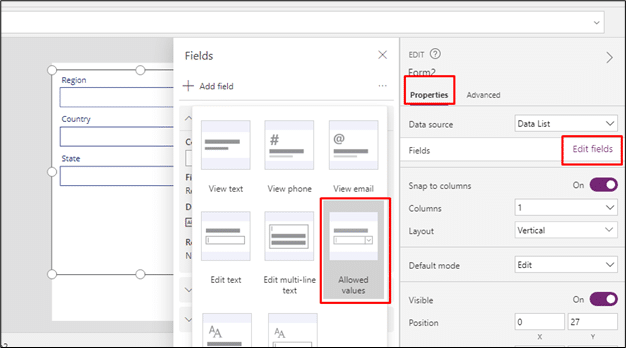
Under the properties tab, click on Edit field, in all the given fields select the Control type to Allowed values.
Set the functionality
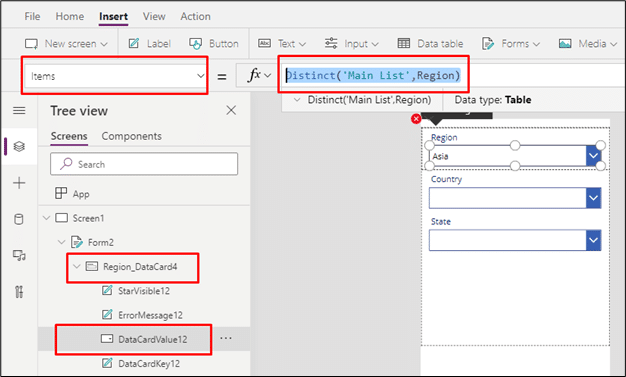
In the form, select the Region Data card and set Item's property to: Distinct ('Main List',Region)
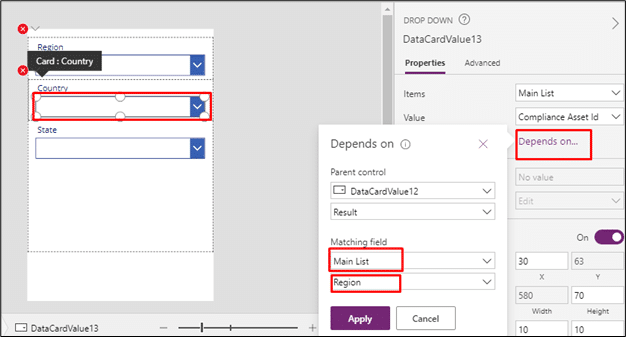
Select the Country DataCardValue, unlock the properties and click on Depends on and in the Matching filed select Main List as Data source and Region in the Attachment.
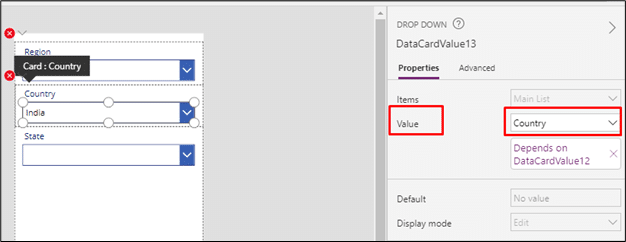
Under properties, In the Value, select Country from dropdown to display the country.
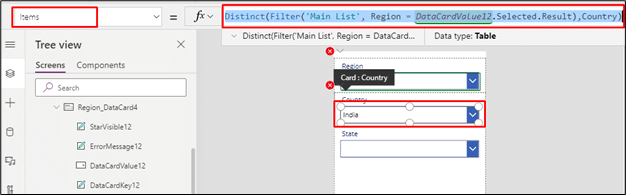
In the form, select the Country Data card and set Item's property to:
Distinct(Filter('Main List', Region = DataCardValue12.Selected.Result),Country).
It will show the all the countries from the selected region without duplication.
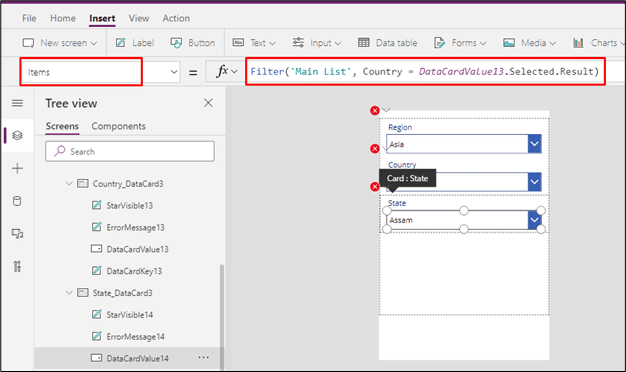
Set the State DataCardValue Items property to: Filter('Main List', Country = DataCardValue13.Selected.Result)
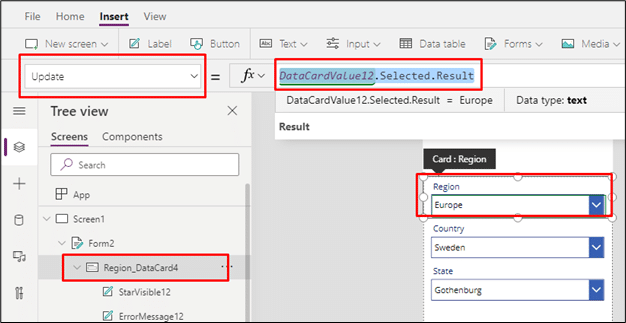
In the Region Data Card set the Update property to: DataCardValue12.Selected.Result
Similarly change the Update property of country also.
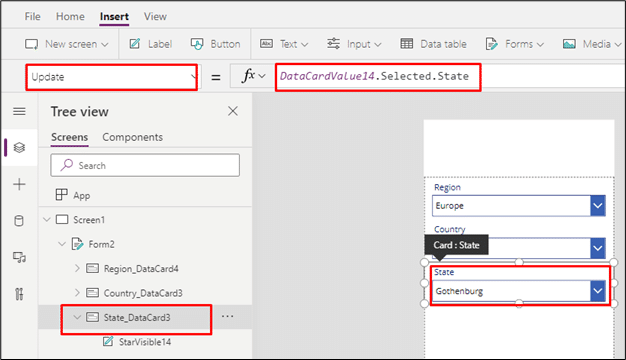
For the State DataCard change the update property to: DataCardValue14.Selected.State
Customize the app
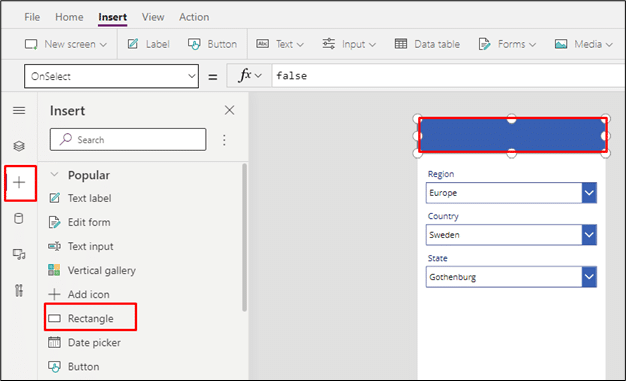
To customize your app you can also add header and label at the top. For that first add a rectangle from the + icon on the left-hand side. Set its position of x and y to 0 and Change the width to 640 and height to 117 under properties tab on right hand side.
From the Insert tab, select Label from the ribbon and set it’s size and position exactly like the rectangle mentioned in the above step. Set Font size to 28, Font Weight Bold, Text alignment as center and set color as white. Set the Text property to “Cascading Dropdown”
Following the above steps, it is very easy to create multilevel cascading dropdown in Power Apps using SharePoint. I hope it helps you to create an amazing apps using Power Apps and SharePoint.
Cynoteck is a Microsoft Gold Partner and Power Platform Partner. With our knowledge across the Microsoft Stack, we build solutions that best fit your needs. We help you identify and utilize your organizational data to the best which lets you make intelligent decisions for your growth.
Connect our team if you are interested in implementing Power Platform in your business
Power Apps is a low-code platform used to build custom applications that can work across all devices whether mobile, tablet, laptop or desktop. The drag and drop functionality, ease of customization, full control on labels, and seamless integration with more than 200+ connectors make Power Apps a preferred choice amongst developers. However, implementing some functionality within Power App can sometimes be challenging. In this article, we will be discussing one of the challenges of implementing multilevel cascading dropdown in Power Apps from SharePoint.
In this post, we will learn how to implement multilevel cascading dropdown in Power Apps with no steps skipped.
Create List from the SharePoint
In the SharePoint create two new list and name them “Data List” and “Main List”.
Populate the Main List with items of Region, Country and State.
Create an app
Login with your credentials in Power Apps Studio to create an app and select the layout of your choice in blank app.
Connect to data sources
In the top navigation bar select View tab and click on data sources. Connect your app with Main List and Data List.
Create a form
Now select Insert tab from the top navigation bar and select Forms from the ribbon.
In the right-hand side under properties, select Data List in Data source
After the data source is connected the form will be displayed on the screen with Title, Region, Country, State and Attachments fields like below.
Remove the fields from right hand side under properties tab by clicking on Edit fields that we do not require for this article like Title and Attachments.
Under the properties tab, click on Edit field, in all the given fields select the Control type to Allowed values.
Set the functionality
In the form, select the Region Data card and set Item’s property to: Distinct (‘Main List’,Region)
Select the Country DataCardValue, unlock the properties and click on Depends on and in the Matching filed select Main List as Data source and Region in the Attachment.
Under properties, In the Value, select Country from dropdown to display the country.
In the form, select the Country Data card and set Item’s property to:
Distinct(Filter(‘Main List’, Region = DataCardValue12.Selected.Result),Country).
It will show the all the countries from the selected region without duplication.
Set the State DataCardValue Items property to: Filter(‘Main List’, Country = DataCardValue13.Selected.Result)
In the Region Data Card set the Update property to: DataCardValue12.Selected.Result
Similarly change the Update property of country also.
For the State DataCard change the update property to: DataCardValue14.Selected.State
Customize the app
To customize your app you can also add header and label at the top. For that first add a rectangle from the + icon on the left-hand side. Set its position of x and y to 0 and Change the width to 640 and height to 117 under properties tab on right hand side.
From the Insert tab, select Label from the ribbon and set it’s size and position exactly like the rectangle mentioned in the above step. Set Font size to 28, Font Weight Bold, Text alignment as center and set color as white. Set the Text property to “Cascading Dropdown”
Following the above steps, it is very easy to create multilevel cascading dropdown in Power Apps using SharePoint. I hope it helps you to create an amazing apps using Power Apps and SharePoint.
Cynoteck is a Microsoft Gold Partner and Power Platform Partner. With our knowledge across the Microsoft Stack, we build solutions that best fit your needs. We help you identify and utilize your organizational data to the best which lets you make intelligent decisions for your growth.
Connect our team if you are interested in implementing Power Platform in your business
3 Comments
Inline Feedbacks
View all comments
Ken Lumbab
April 18, 2021 9:27 pm
Hi, I am able to create the multi level dropdowns in power forms, however when I edit the entry, all the boxes are blank (selections not retained). Any suggestion on what formula I can use as datacard default? Your help would be much appreciated.
User
May 5, 2021 3:53 pm
How did you go about populating the SharePoint list? I imagine this was quite a bit of data so (1) what source did you use and (2) did you automate creating the list items?
Dawn Tesnow
May 13, 2022 1:49 pm
Is there a way to hide ‘blank’ values in the list. I have some entries that do not have a “state”, just a “region” & “country’?


Hi, I am able to create the multi level dropdowns in power forms, however when I edit the entry, all the boxes are blank (selections not retained). Any suggestion on what formula I can use as datacard default? Your help would be much appreciated.
How did you go about populating the SharePoint list? I imagine this was quite a bit of data so (1) what source did you use and (2) did you automate creating the list items?
Is there a way to hide ‘blank’ values in the list. I have some entries that do not have a “state”, just a “region” & “country’?