
Excellent customer service is one of the important goals for organizations that aim for a tremendous level of customer loyalty and commitment. For several other distributors and, a sales return can be a conventional component of their customer support policy, which directly impacts customer’s understanding of the level of service provided by you.
With Dynamics 365 Business Central, you can track all the details and items plus also return them or choose for a refund. Now, as the return or refund process begins with Dynamics 365 Sales, data automatically moves to the finance module, linking to the supply chain workflow for returns. We have tried out some options for refund in Dynamics 365 Business Central. Here in this article, we will initially describe a possible situation when a refund is required and referring to an account record, then explain how to go through the refund process in Dynamics 365 Business Central.
A Simple Process to Ensure a Smooth Transition and Happy Customers
You need to start with un-applying the payment, simply open the customer card for one of the concerned customers, and choose “Ledger entries” located below the Navigate tab:
1) Find the “Payment” and then click on the “Unapply Entries” choice under the Actions tab.
2) Choose the Row with the “Initial Document Type” of payment and click on “Unapply” below the Home tab. Click on “Yes” to approve the unapplying of the payment.
3) The system will show the following message as the payment gets unapplied: “The entries were successfully unapplied.”
4) Generate Refund
Also, read: PowerApps integration with Microsoft Dynamics 365 Business Central Online
Steps to initiate Refund in Business Central
Sometimes automatic payments do not always automate the way you wish them to. We are thankful that Dynamics 365 Business Central is more lenient in correcting a transaction that has an automatic payment applied, simply remove the payment from the invoice and generate a refund in Dynamic 365 Business Central.
Customer Refund – When we get double payment and we need to refund the extra amount to the customer, then we can use the following specified steps to create a refund:
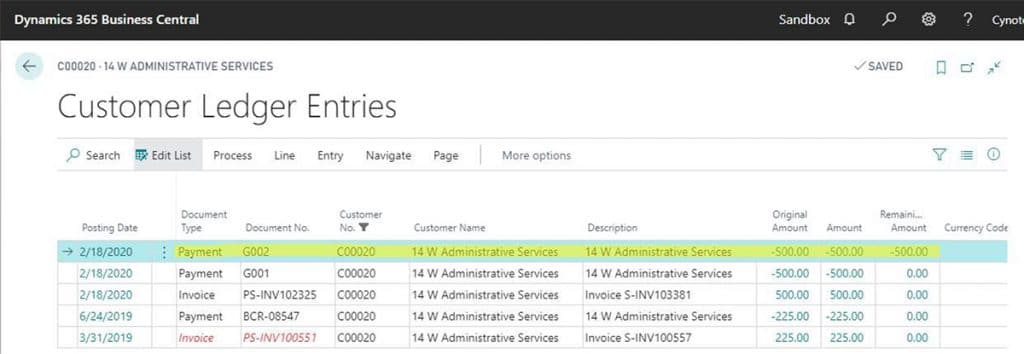
Step 1) Check the Customer Entries
You need to check the customer ledger entries, where you can identify the duplicate payments. When you make a cash refund or get a cash receipt from a customer, you must choose whether to apply for the payment or refund to credit entries or close one or more open debit. You can mention the amount that you want to apply. For instance, applying partial payments to consumer ledger entries. If you are about to close customer ledger entries it indicates that information such as account statements, customer statistics, and other finance charges are correct and accurate.
Step 2) Create Journal Entries, Open the Payment Journal and fill the required fields to complete the Refund process.
The cash receipt journal is a kind of common journal; hence you can utilize it to post transactions to the bank, customer, general ledger, vendor, and fixed assets accounts. when you post the payment, you can apply the payment to one or more debit entries, or you can additionally apply from the posted entries.
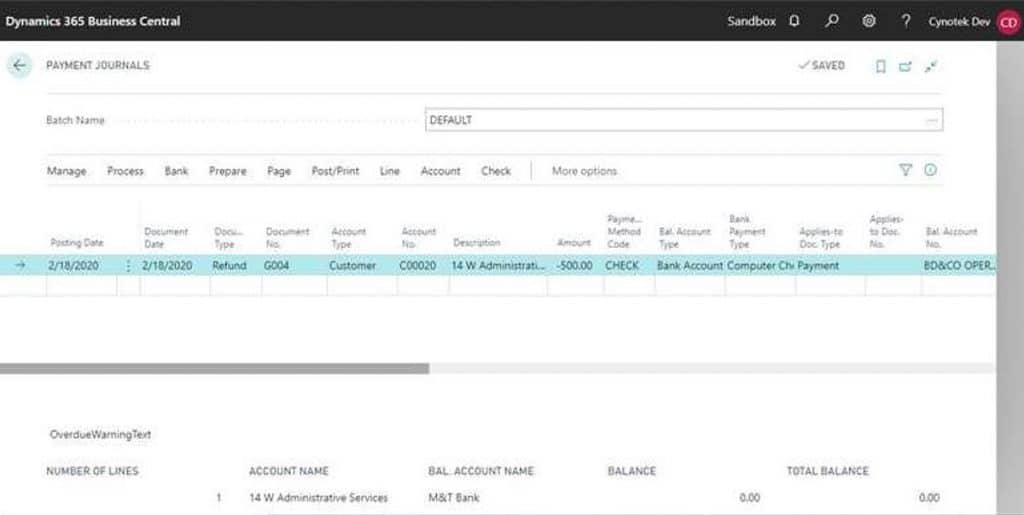
You need to fill the following fields to complete the Refund process:
i) Document type- refund
ii) Account type- customer
iii) Account no.- select customer
iv) Payment method- check
v) Bal. account type- bank
vi) Bank payment type- computer check
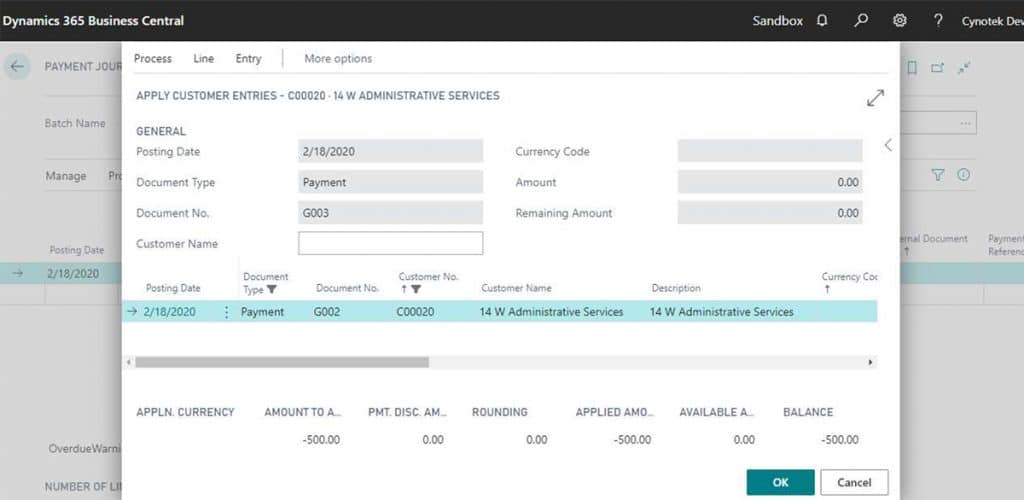
vii) Applies-to doc. No- Click on dots. Select payment the ok.
Step 3) Print Check: Check-> print check. Then print.
Print the check, so that the document number field will be populated with the corresponding check number (shown below). Check is printed. After printing the check, Post the General ledger entries.
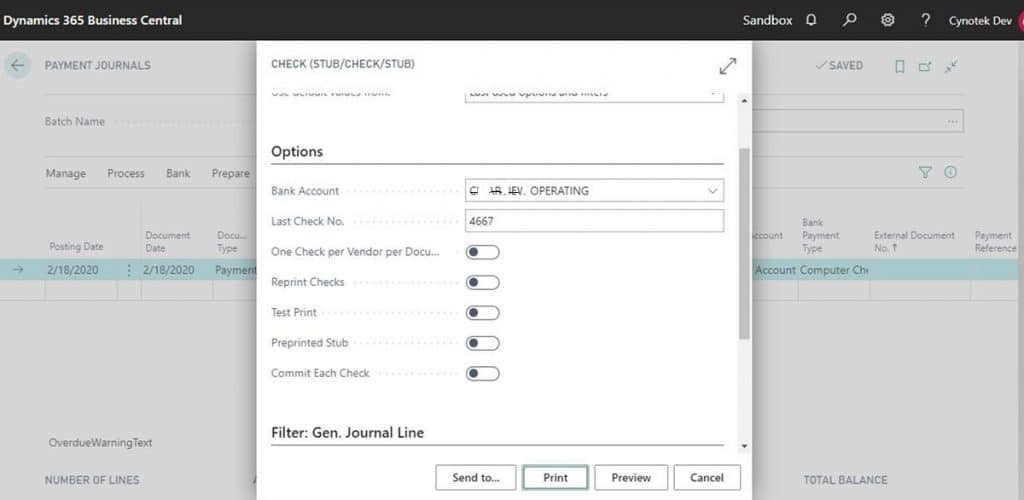
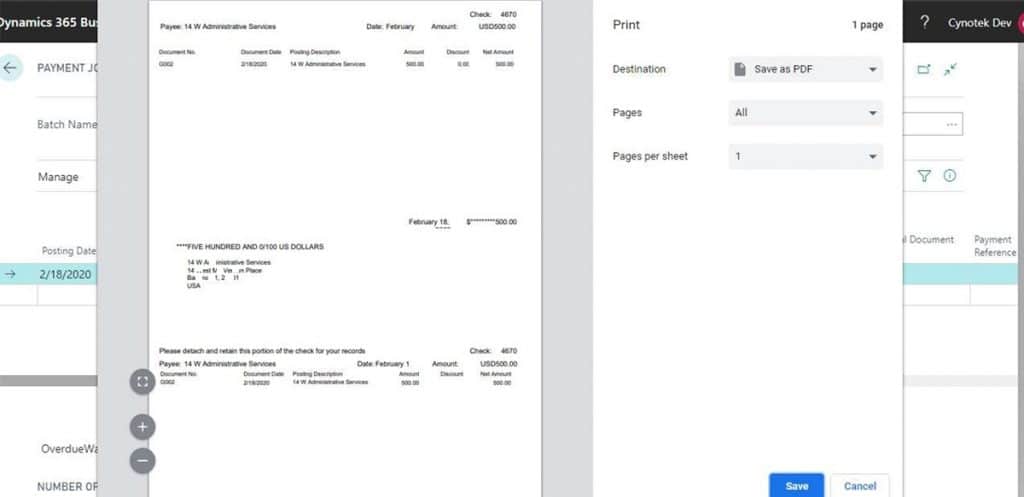
Your printer must be accurately set up with the check forms, and you must set which check layout to apply, and you can print up to 10 invoices on a page for a check stub.
Step 4) Check again the Customer Ledger Entries
If we initially take a glimpse at the “Customer Ledger Entries” page we can observe that it shows all the different documents that we have posted against our customers. Utilizing this page, we can instantly view payments, outstanding invoices, and much more.
Now, this is the final step. You need to open the Customer’s Ledger Entry then Check the entry to ensure the status of the entry. It will become 0.00 after successful entry.

Also, read: Business Central Integration with QuickBooks and D365 Sales module
Conclusion
With Dynamics 365 Business Central you can provide your vendors and customers the support and service that they are demanding and expecting. You will like the functionality in Dynamics 365 Business Central, it does not matter what your return management policy is, Dynamics 365 presents the functionality to efficiently process returns, replacements, and refunds. You can analyse and perform the above-defined process whenever required, it is a spontaneous process and does not demand that many different steps.
Thanks for reading, all the best!
Now make extremely customizable transactions in a very easy way, sort your invoices or purchase orders quickly, and save hours of your time. Thankfully, Dynamics 365 Business Central provides the flexibility to manage returns, it is intuitive with simple functionality and does not need lots of different steps to execute a transaction.
For any technical support or to assist you with a Dynamics 365 Business Central or for its trouble-free implementation, please feel free to contact us.
Salesforce Consulting Services
If you are new to automation and confused about Workflow or Process Builder. Need not to worry, we have got you all covered. Talk to our experts and clear all the cloudy thoughts about automation.
