Power Virtual Agents empowers everyone to build intelligent chatbots without the need for any prior coding experience. As Power Virtual Agents belong to the Power Platform family, therefore its integration with Power Automate and its ecosystem of hundreds of connectors is streamlined.
Users can call an Automate Flow to enable chatbots to perform an action. As low-code or no-code is rising, Microsoft is coming up with new features and functionalities in Power Platform every time.
Recently, In the Microsoft Ignite event that took place from 22-24 September, Microsoft announced Public Preview of deep integration between Power Virtual Agents and Microsoft Teams.
During the unprecedented times like these, the shift around the world is towards working remotely. There has been a huge surge in virtual communication and conversations between businesses and their employees.
More than ever, the organizations are focusing on Artificial Intelligence to help customers and Employees to answer the common queries. Microsoft Teams is very popular within the organizations for chat, calls, meet and collaboration. Bots built using Power Platform within Teams will increase employee engagement, productivity and efficiency.
Creating Teams bots using Power Virtual Agents was already possible without any coding experience, but its deeper integration with Teams will make it easy to fulfil any scenario especially those that arise within an organization.
With Power Virtual Agents in Microsoft Teams you can:
- Create bots easily and within no time
- Build Bots that can take action on someone’s behalf
- Analyze and review the performance of the bot, for instance what questions can be asked from the bot, and how good it is in understanding and answering the question.
- Create bot, test it, publish it and share it to be used by other employees within the organization.
To see how amazing this integration is, and help you understand I have created step by step process to create a human resource bot.
Steps To Create A Chatbot with Power Virtual Agents in Microsoft Teams
1. Install the Power Virtual Agents app in Microsoft Teams
- Begin with launching a Power Virtual Agents app in Microsoft Teams.
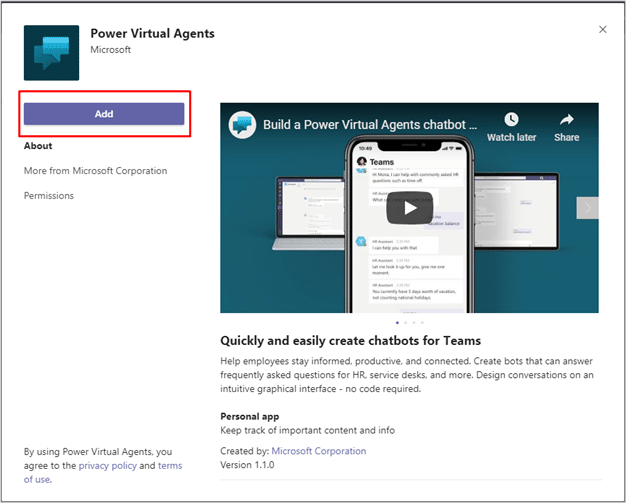
- In the Microsoft Teams app, search for Power Virtual Agents. In the search result, you will find Power Virtual Agents app from Microsoft Corporation.
- Select the Power Virtual Agents app and then click on Add.
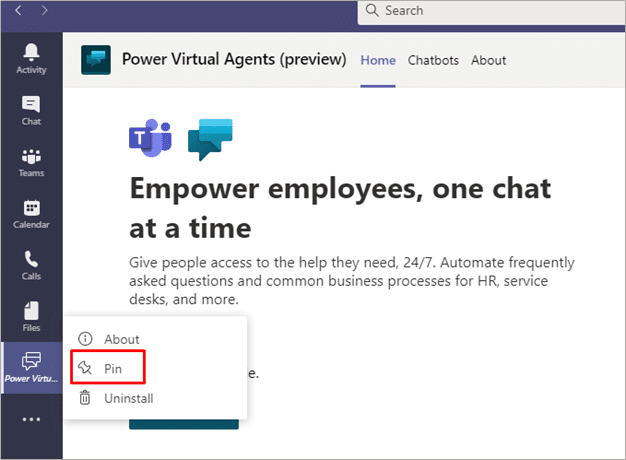
- The app is visible in the left navigation bar in Teams, and opens at Power Virtual Agents Home page. From here, the users can easily make intelligent bots without leaving the Teams interface.
- For easy access, select and hold (or right click) the Power Virtual Agents icon and select Pin.
2. Create a new chatbot in a team
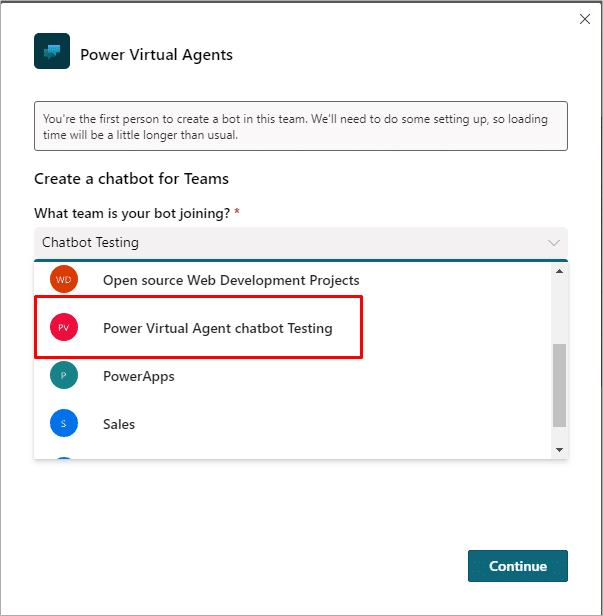
- Click on Start now on the Home Page
- From the drop-down option, select the team by which you want to manage your chatbot. For the blog purpose, I have created a new team by the name of Power Virtual Agents chatbot testing. If you are not aware, how to create a new team, Click here.
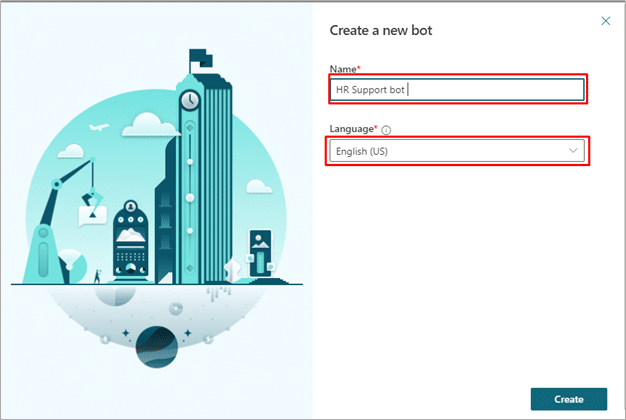
- Create a new bot form will open, fill in the bot’s name and language and select Create. Let’s use HR Support bot to fill in the name and the language be default.
- As the bot is created, we can start adding content to it.
3. Build an employee time-off topic for common time-off queries
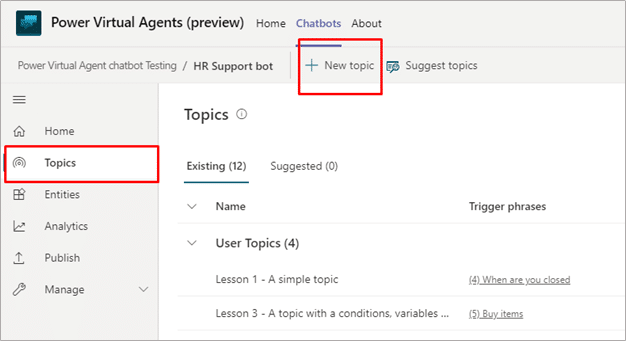
- Go to the Topics from the side navigation pane and select +New topic from the top menu bar to create a new topic.
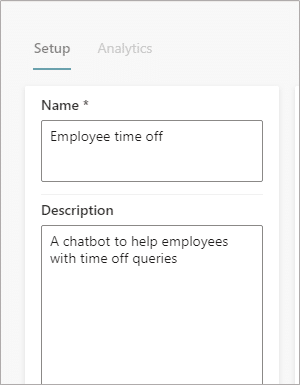
- Set Name to “Employee timeoff” and in the description add “A chatbot to help employees with time off queries”.
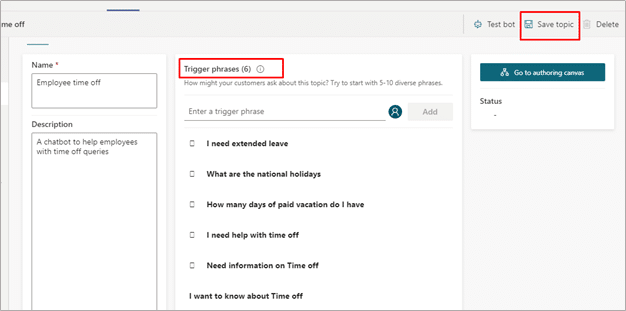
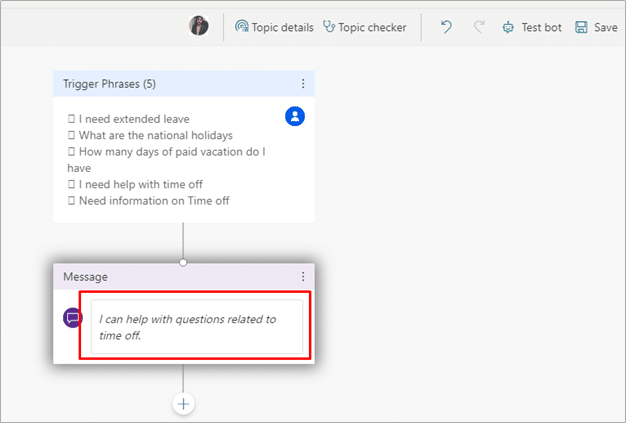
- Create trigger phrases. Trigger phrases are the set of questions that users will mostly ask about the topic. Let’s add few questions that employees might ask about Time off:
- I want to know about Time off
- Need information on Time off
- I need help with time off
- How many days of paid vacation do I have
- What are the national holidays
- I need extended leave
Power Virtual Agents comes with built-in natural language capabilities. You only need to define few triggers phrases that you expect employees to ask and the bot can accurately trigger the topic based on the employee’s input.
- Select Save topic.
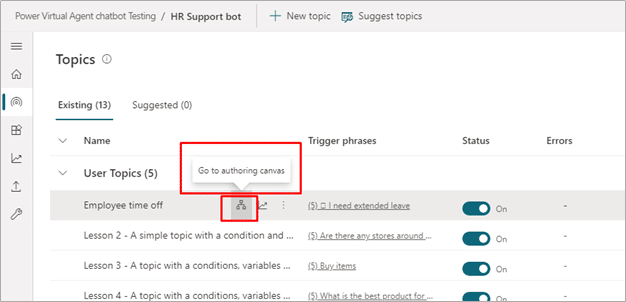
- Select Go to authoring canvas to build the conversation flow for the topic.
- As the trigger is defined, we can proceed to define the bot’s interaction with the user when this topic is engaged. The graphical interface in Power Virtual Agents lets you build the topic without needing to write a single line of code.
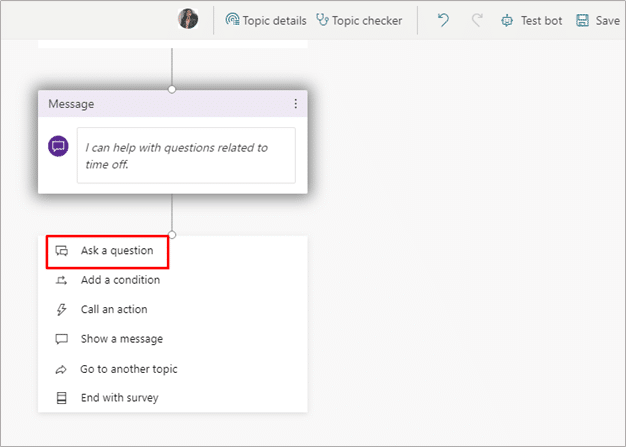
- Next in the message node, enter the text I can help with questions related to time off.
- Then select the + below the message node and select Ask a question to add a question node to the topic.
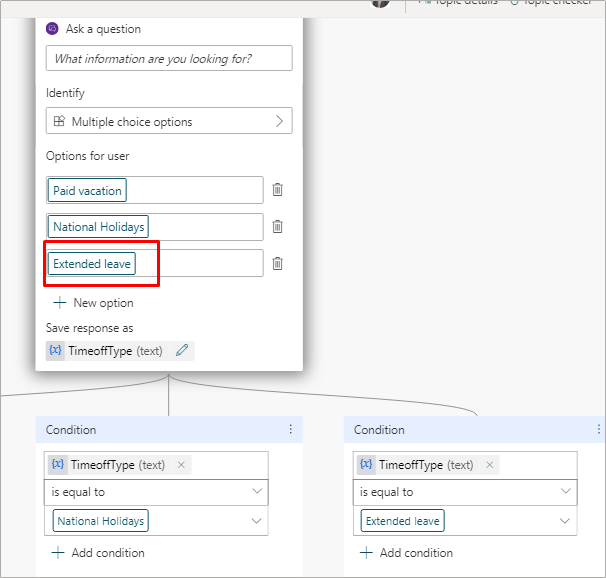
- In the Ask a question text box, enter What information are you looking for? This question will be asked from the employee on interaction.
- In Options for user, add Paid vacation and National Holidays as two options for paid time off.
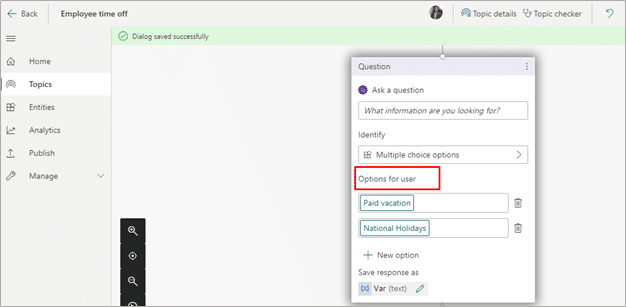
You will see user choices are stored in the variable and the branching appears on the basis of the option user chooses.
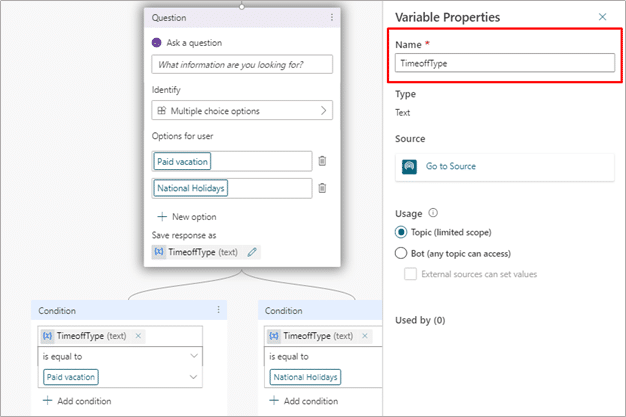
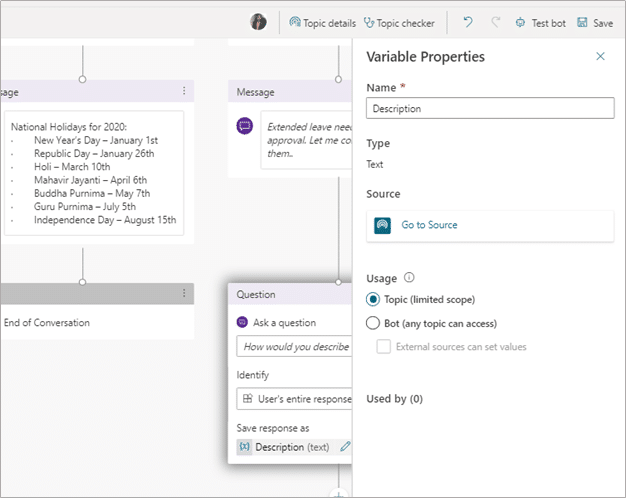
- Select the pencil icon on the variable under Save response as, to edit the variable properties.
- The Variable properties pane opens, you can rename the variable to TimeoffType. After closing the variable pane, the changes are reflected in the authorizing canvas.
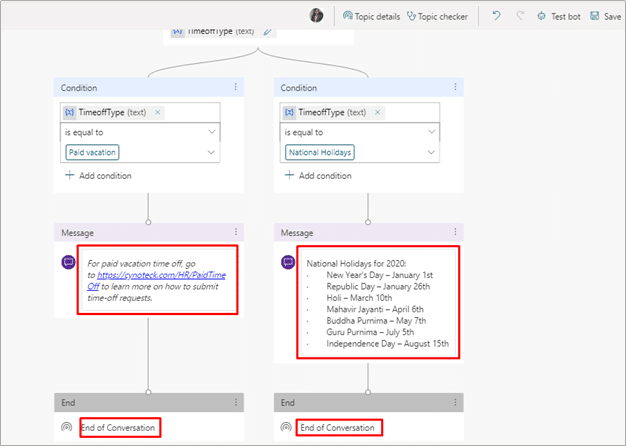
- Now we will add different responses for each option. For paid vacation, we can have the bot point employees to an internal HR website to look for paid time off policies.
- From the add icon select a message node specifically for the Paid vacation branch, and add the following message: For paid vacation time off, go to https://cynoteck.com/HR/PaidTimeOff to learn more on how to submit time-off requests.
- In the National Holidays branch, add a message node with the following text:
National Holidays for 2023:
- New Year’s Day – January 1st
- Republic Day – January 26th
- Holi – March 10th
- Mahavir Jayanti – April 6th
- Buddha Purnima – May 7th
- Guru Purnima – July 5th
- Independence Day – August 15th
- End this path in the topic with a survey as well: add a node by selecting the + then End the conversation and End with survey.
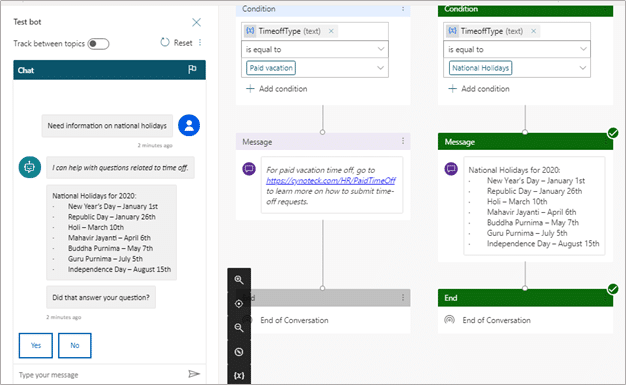
4. Test bot for user interaction
You can test the chatbot in real time as Power Virtual Agents comes with built-in test bot facility. We shall test the bot by launching the test bot canvas and entering the employee’s input.
You can select purple bot icon at the bottom of the screen or select Test bot from the top navigation on right hand side to test your bot.

- To test, type in I need time off information. Although this phrase does not directly match with the phrases we added, but Power Virtual Agents is able to proceed with the entered text and trigger the employee time off topic
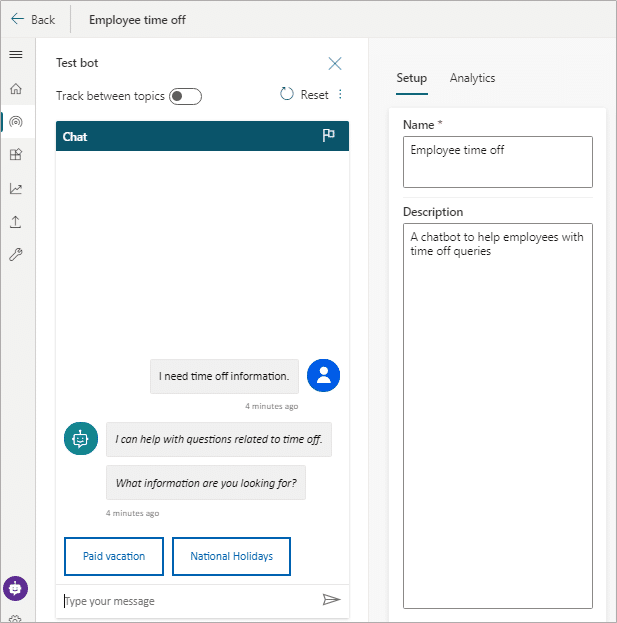
- Select Paid vacation and it will display the text that we entered in the message node in Paid vacation branch.
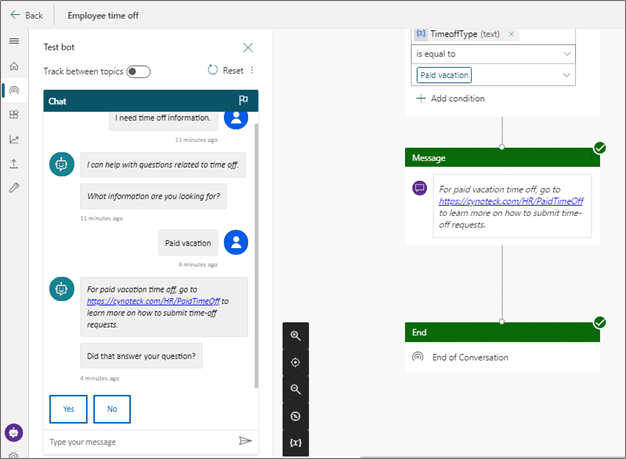
- Reset the test bot canvas by selecting the Reset above the test bot pane.
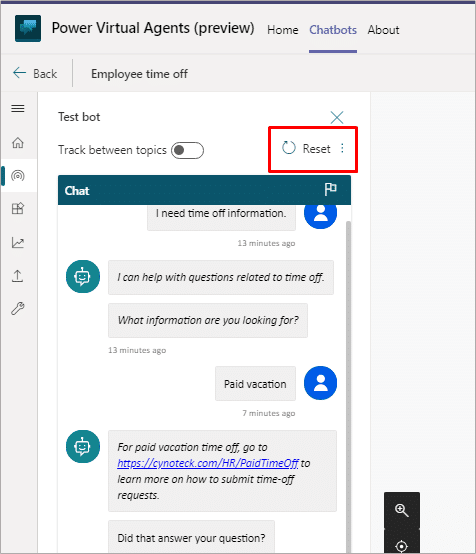
- In the input box type the message Need information on national holidays
You will notice the bot is able to bypass the vacation question and directly provides information about national holidays. This is because Power Virtual Agents support entity extraction.
5. Enhance the capabilities of a bot by adding Power Automate Flow in the topic to handle complex query.
- From Home Page, select Go to topics and select Go to authoring canvas.
- In the Ask a question node, under option for user add Extended leave.
- As every employee situation is different, it needs a discussion with a HR expert. Therefore, in the message node add a message that says Extended leave needs HR expert approval. Let me connect you with them.
We can add Power Automate flows into a topic, so that bot can take action.
- We will create a flow to send the message to the specific team and call through input.
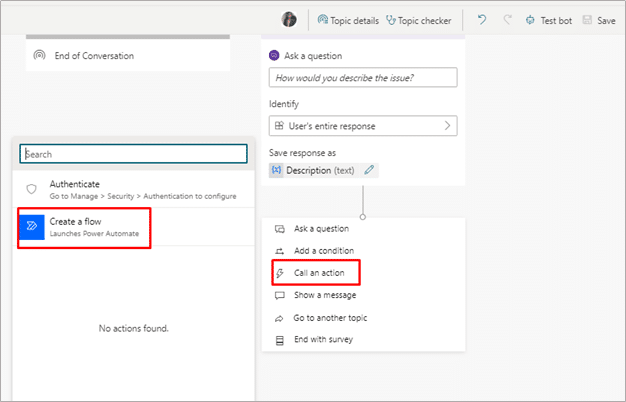
- From Ask a question node, add a question to describe the issue: How would you describe the issue? Save the description with the variable name Description.
- Add a node under the question and select Call an action. Select Create a flow.
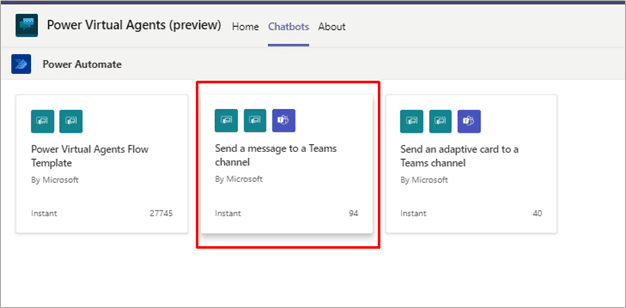
- We will use built-in template to send a message to Teams channel, then select Continue.
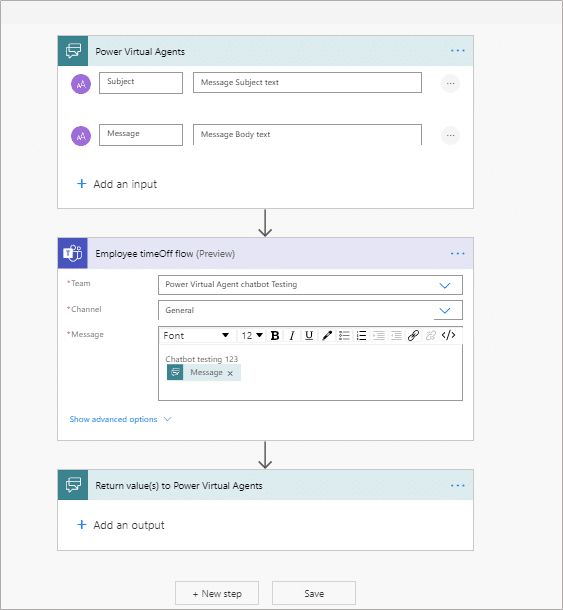
- The flow template taken in two input, one form the subject and other from message. In the Post a message(v3), select the Team ID and Team channel ID. Add some text in the message in addition to the description given by the user and complete the Message field. Name a flow and save it.
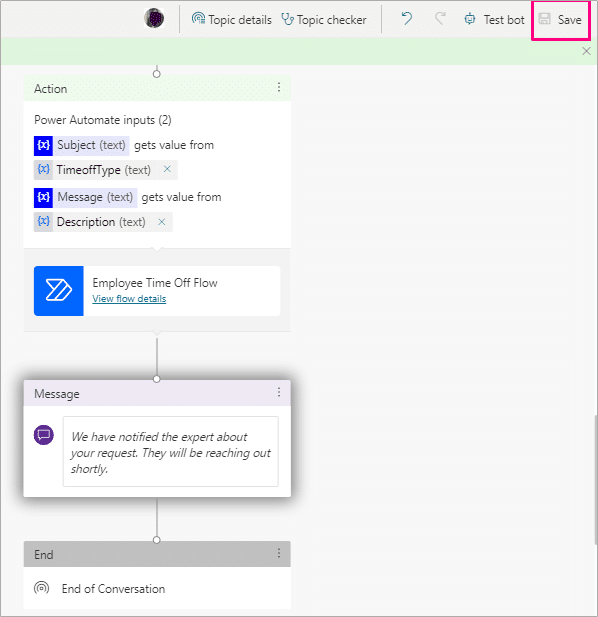
- It will take you back to authoring canvas. Now add Call an action and select the newly created flow.
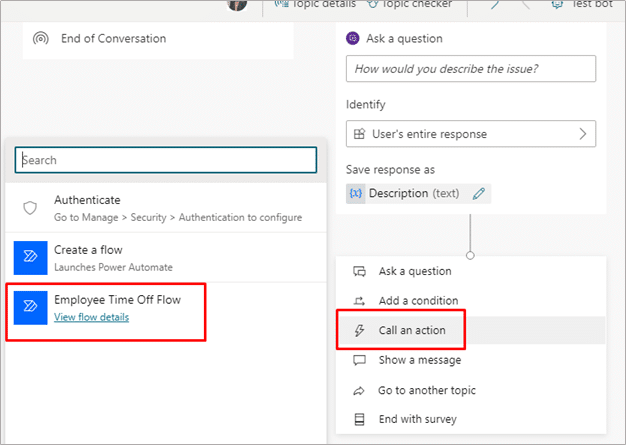
- For the subject, pass the variable TimeOffType and the Description gathered in the chat.
- Therefore, when the flow posts a message on the Teams channel, it will state Extended leave as the title and the message defined in the flow.
- Now let the user know that their request is sent to HR and will be reaching out soon.
- Add a message node with text We have notified the expert about your request. They will be reaching out shortly.
- End a conversation with a survey.
- Finally, Save the topic
6. Publish the Chat Bot
Once you have tested your bot after the topic is constructed, you can publish your bot and make it available to the end users.
- Select the Publish icon from the side navigation menu and click on Publish
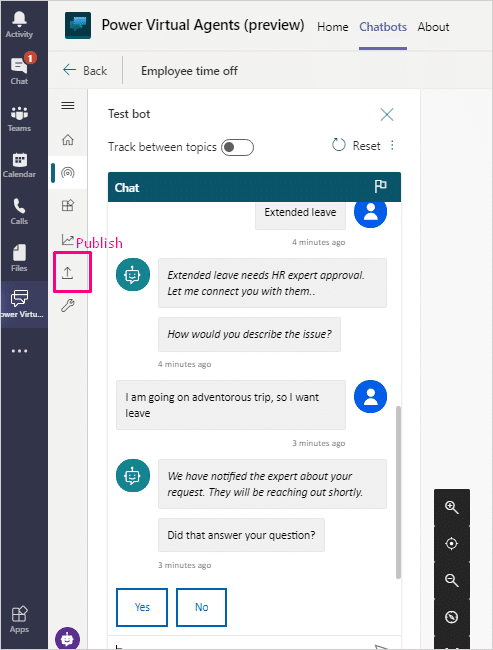
- On the Publish page, you will see two options: Open the bot and Share the bot.
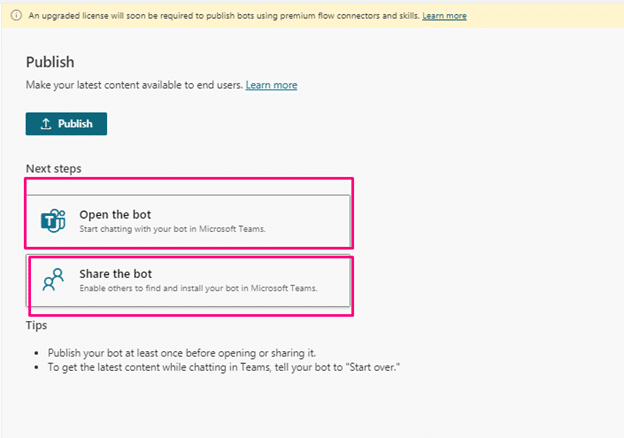
- With Open the bot, you can add it in Teams and chat with it. It takes few minutes, before you can start chatting with bot
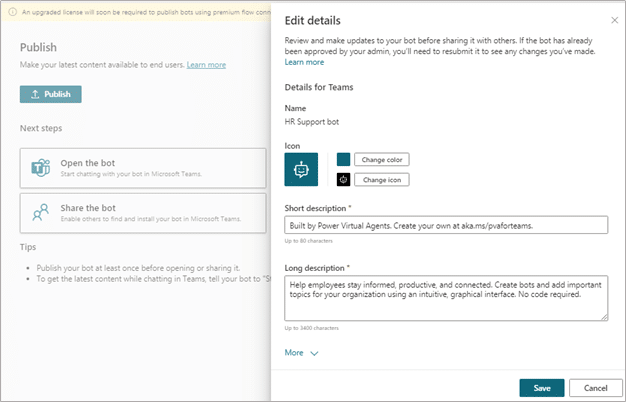
- With Share the bot, you can make your bot available for other users. When you select Share the bot, it opens a pane with customization options with Edit details.
Close the edit pane and click on Share and select Add to Teams, the bot will be added to Teams for use. For approval from Admin, select Remove if it says added to Teams.
Select Submit for admin approval. After final confirmation is done the bot will be sent to admin for approval. After Refresh it will be ready to use.
Conclusion
In conclusion, leveraging Power Virtual Agents can revolutionize your business’s customer service experience. By creating and deploying chatbots within Microsoft Teams, you can streamline operations, automate processes, and enhance interactions with your customers.
With the power of Power Virtual Agents, your business can stay ahead of the competition and deliver exceptional service. Embrace the potential of chatbot technology and unlock new opportunities for growth with professional Power Virtual Agents consulting services.
Microsoft Power Platform Consulting
Still, have a question? You are free to contact me or other experts in our team to showcase the real power of PowerApps to you.


Me respondio la duda que tenia, muchas gracias!