Introduction
As defined by Microsoft “Devops is a compound of development (Dev) and operations (Ops), DevOps is the union of people, process and technology to continually provide value to customers.”
Devops combine the different roles like development, IT, Operations, quality engineering and security to produce better and reliable product. Its main aim is to shorten the development lifecycle for a product and achieve business goal faster.
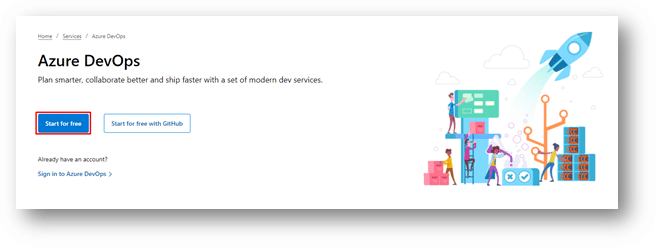
Create an Azure DevOps account
Register with New Account: Click on below link to register for DevOps Account
http://azure.microsoft.com/en-gb/services/devops/
- Click on Start for Free
For Dynamics 365/ CDS Environments
- Register a new Trial: Click on the link “https://trials/dynamics.com”. Check our existing blog for how to register.
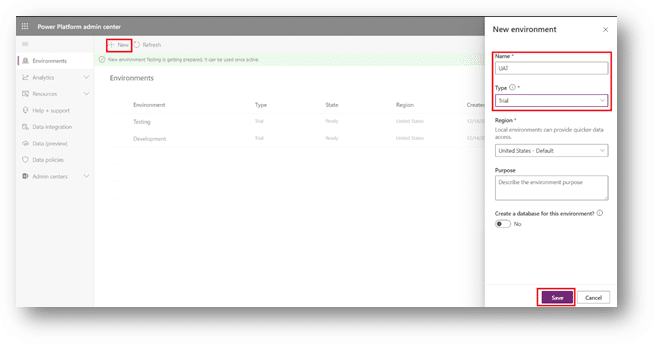
Steps to create an Environment
For the article purpose we will create three environments: Development, Testing, and UAT
- Click on https://admin.powerplatform.microsoft.com/environments
- Click on New à Type the Environment Name e.g.: Development and Click on Save button
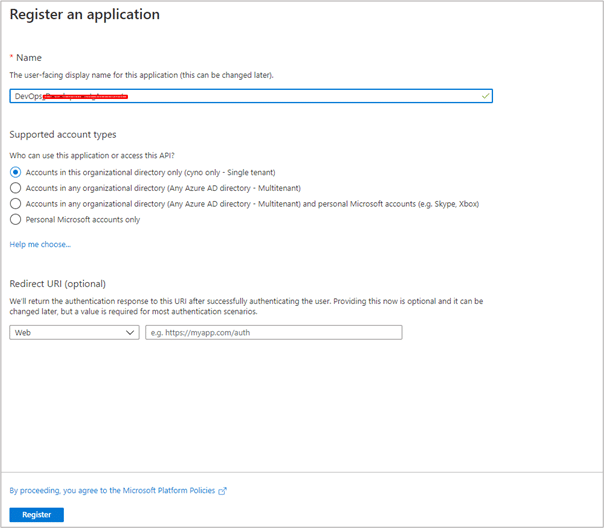
- For App Registration: Click on Link https://portal.azure.com/ à Open active Directory à Click on App Registration.
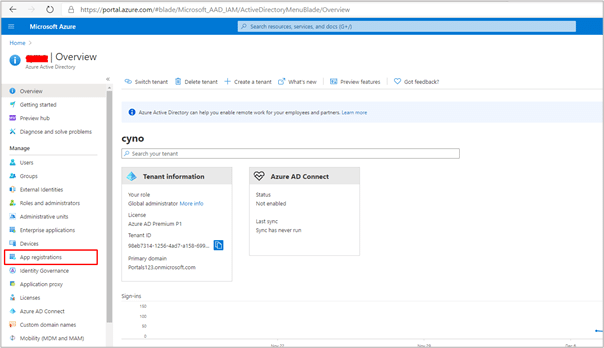
- Click on New Registration

- Type the Name of your choice to register an app and Click on Register button
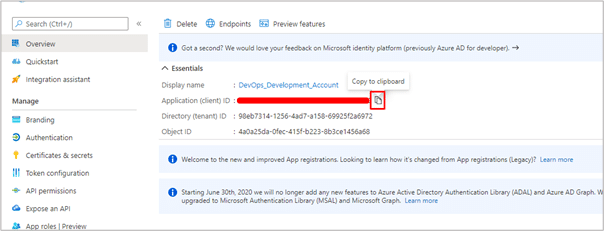
- Application ID –> Click on Copy to Clipboard button
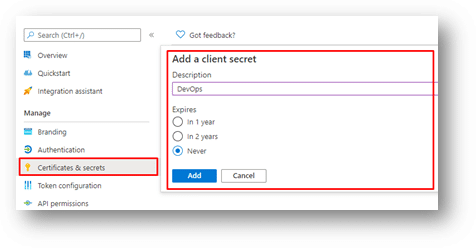
- Create secrets –> Click on Certificates & Secrets.
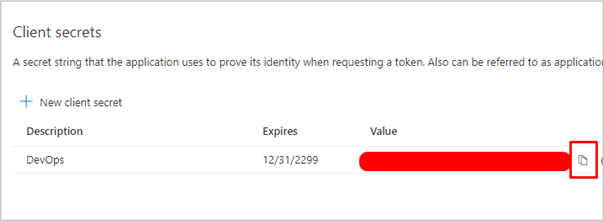
- Client Secrets –> Copy Value of secret Key
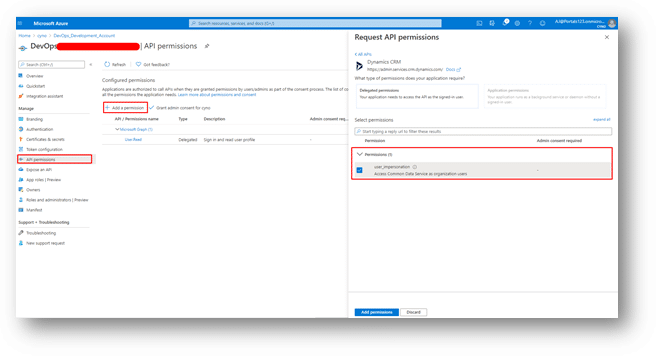
- API Permissions: Click on API Permissions –> Click on Add a Permission –> Select APIs my organization uses –> Search Common Data Service –> Select Common Data Service –> check user_impersonation –> Click on Add Permission.
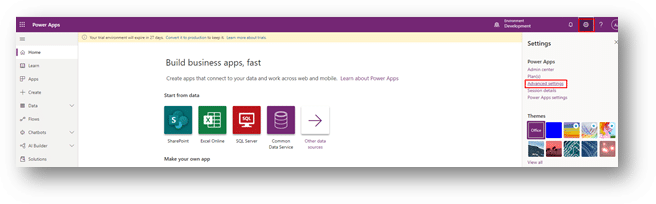
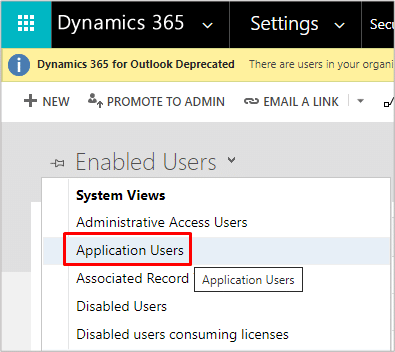
- Add Application User -> Open link https://make.powerapps.com/ Click on Setting Icon -> Click on Advanced Settings.
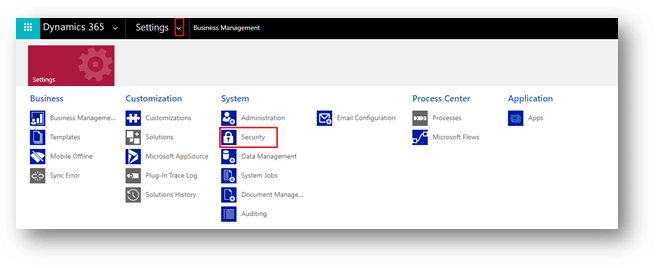
- Click on Setting -> Select Security
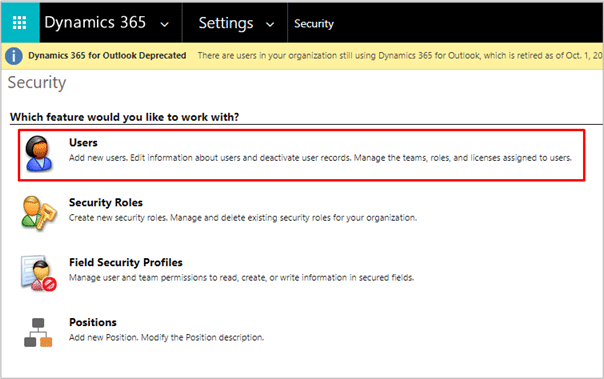
- Click on Users
- Select System View -> Application Users -> Click on New Button
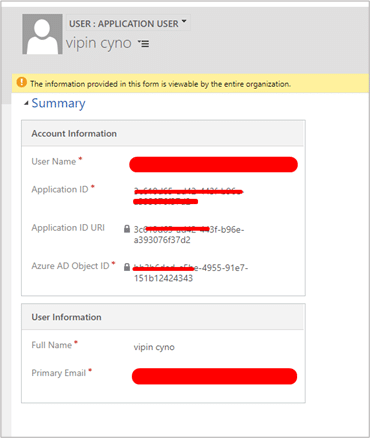
- Enter the account information, in User Name fill user email id, in Application ID enter the detail copied from above step and click on Save
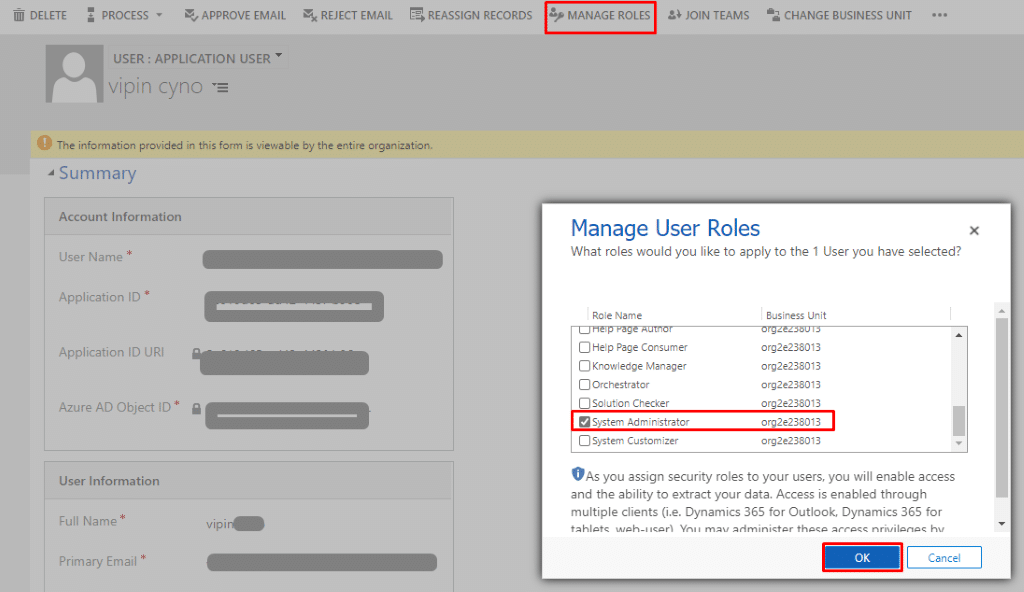
- Click on Manage Roles -> Check the System Administrator Role -> Click on Ok.
Steps to configure Devops
Create Project
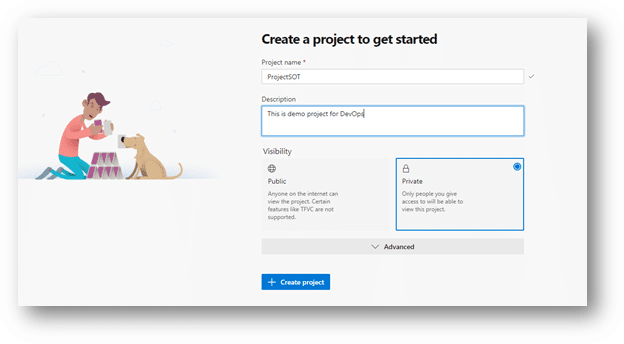
- Sign in DevOps by click on link https://dev.azure.com/. Or https://app.vssps.visualstudio.com/
- Create a New Project à Type your preferred project name in Project Name box & click on [Create Project] Button.
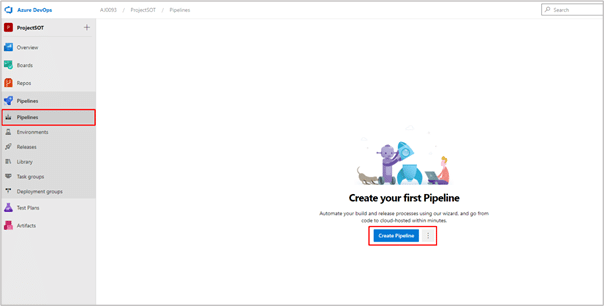
Create Pipelines
- From the left-hand navigation bar, Select Pipeline and click on Create Pipeline
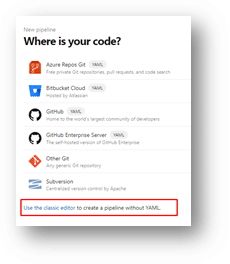
Note : Azure DevOps allows you to create two types of PipeLines such us XML (Code) and YAML(UI)
- Click on “Use the classic editor” Link
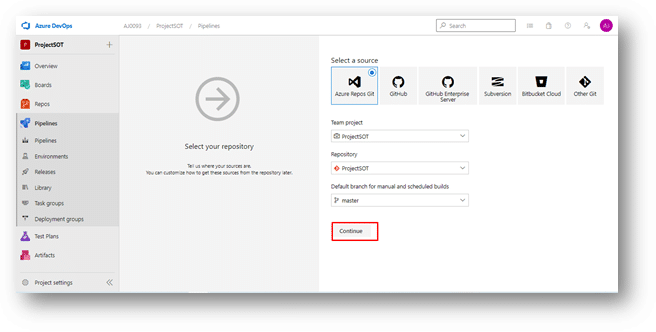
- Select a Source and click on Continue.
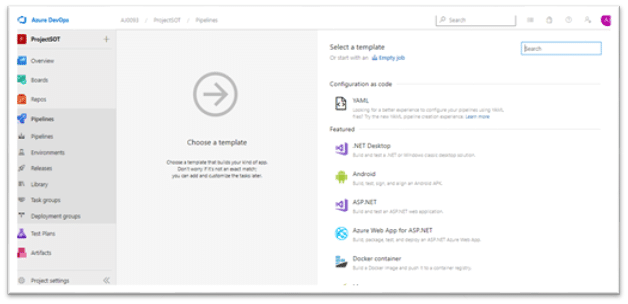
- Select Empty Job
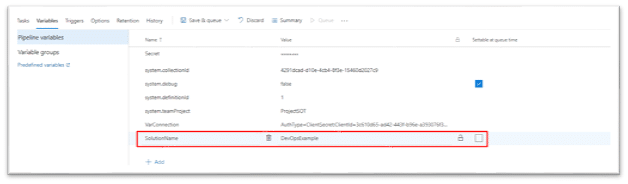
- Change the Name of PipeLine e.g. “DevOpsExample” and Click on Save & Queue. Search PowerApps and click on [Get It Free] button.
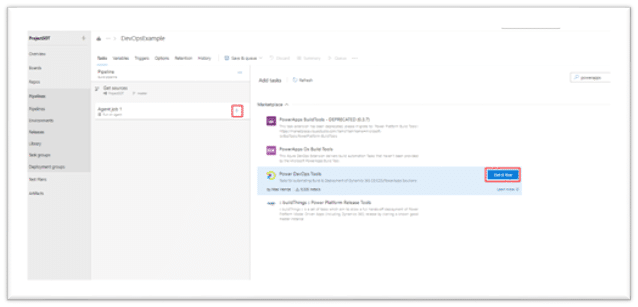
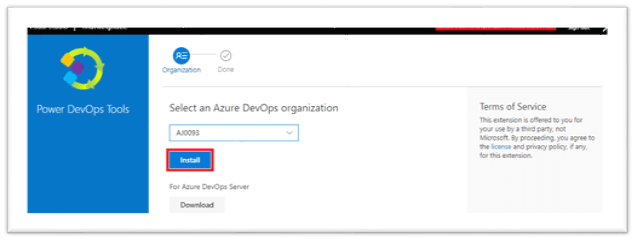
- Click on Install
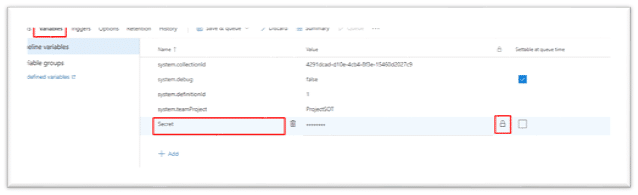
- Add a Variable -> Click on Variables -> Type Name Secret and paste your azure secret.
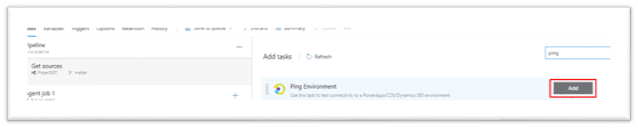
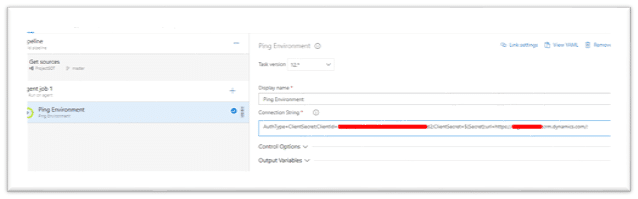
- Ping the Environment: In Search Box type : “Ping” and Select Ping Environment -> Click on Add.
In Connection String Area :
AuthType=ClientSecret;
Client ID : Azure Tenant ID;
Client Secret: $(Secret) Variable.
URL : Tenant URL
- Add Power DevOps Tools -> Type in Search box “Power DevOps” -> Select Power DevOps Tool Installer -> Click on Add.

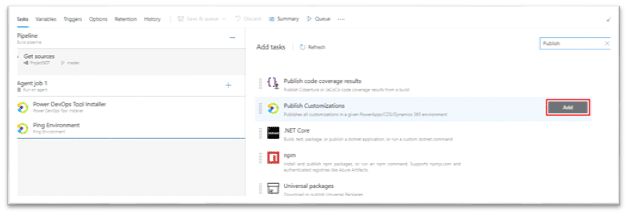
- Add a Publish Customizations -> Type in Search box “Publish ” -> Select Publish Customizations -> Click on Add.
- Click on Variables -> Add a variable name “VarConnection”, which store a connection string value.
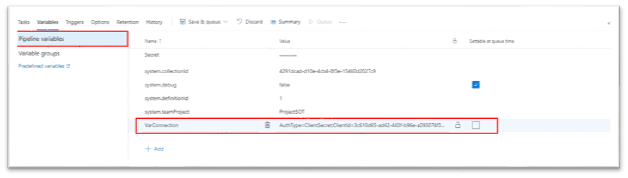
- Configure Publish Customizations -> In Connection String name box type the variable name e.g. $(VarConnection)

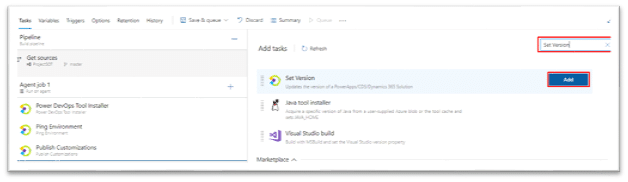
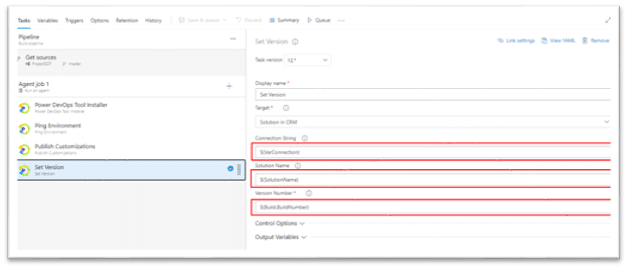
- Add Agent Job -> Set Version à Type in Search box “Set Version ” -> Select Set Version -> Click on Add.
- Click on Variables -> Add a variable name “SolutionName”, which store a SolutionName value.
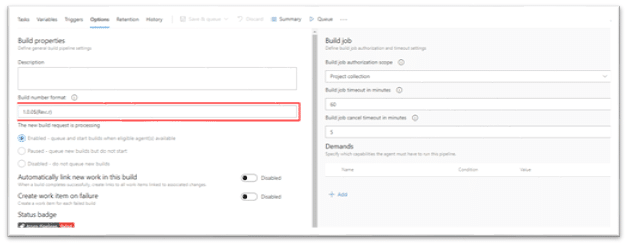
- Setting up Build number format -> Click on Options -> In Build Number Format Box type 1.0.0$(Rev:.r).
- For Reference please check: https://docs.microsoft.com/en-us/azure/devops/pipelines/process/run-number?view=azure-devops&tabs=yaml
- Configure Set Version -> In Connection String name box type the variable name e.g. $(VarConnection) -> In Solution Name box type the variable name for solution e.g. $(SolutionName) -> In Version Number name box type the $(Build.BuildNumber).
- For Reference please check : https://docs.microsoft.com/en-us/azure/devops/pipelines/build/variables?view=azure-devops&tabs=yaml
- Add Export Solution -> Type in Search box “Export ” -> Select Export -> Click on Add.
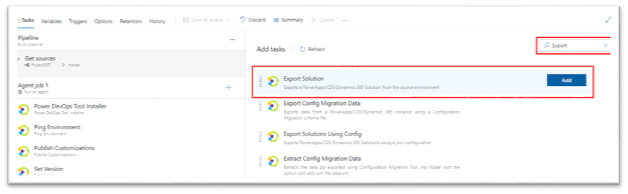
- Configure Export Solution:

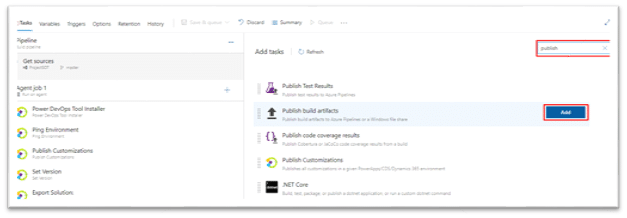
- Add Publish build artifacts -> Type in Search box “Publish” -> Select Publish build artifacts -> Click on Add.
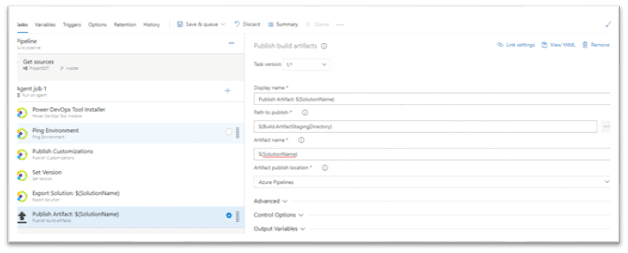
- Configure Artifacts
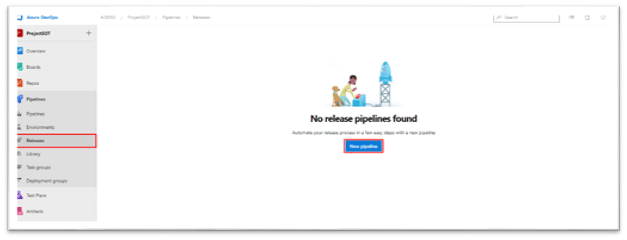
Releases
- Click on Releases -> Create a [New pipeline] button
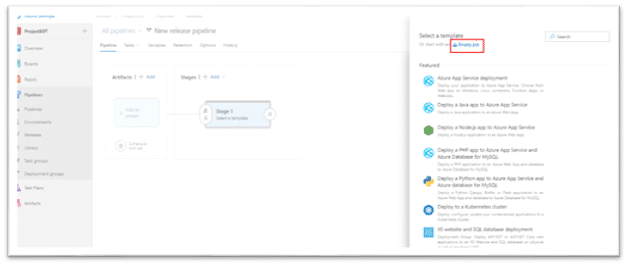
- Click on [Empty Job] link
- Change the Name of Pipeline and click on Save button.
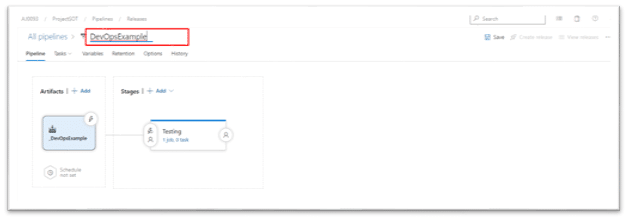
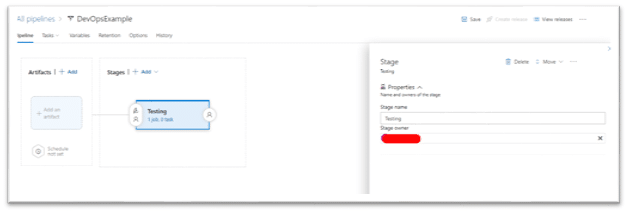
- In the Stage name box type your environment name such as Testing.
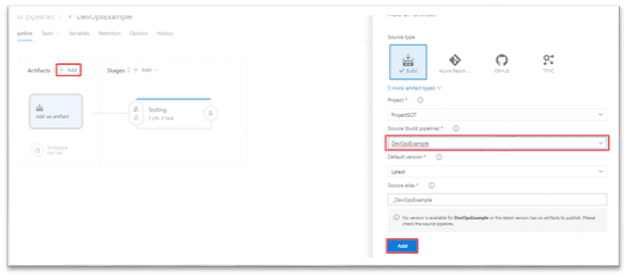
- Add Artifacts -> Click on [+ Add] link -> Select Source ->Click on [Add] Button.
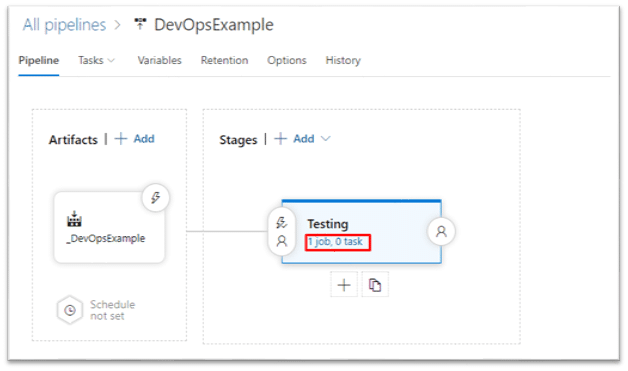
- Adding task to pipeline -> Click on [1job,0 task] link or Click on Tasks tab
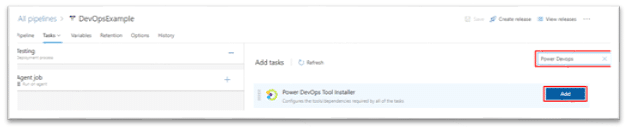
- Add Power Devops Tools -> Type in Search box “Power DevOps” -> Select Power DevOps Tool Installer -> Click on Add.
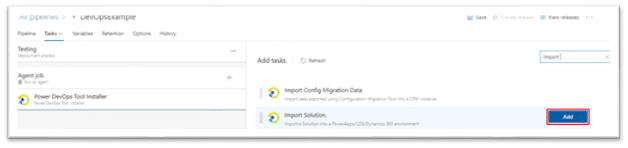
- Add Import Solution -> Type in Search box “Import” -> Select Import Solution -> Click on Add.
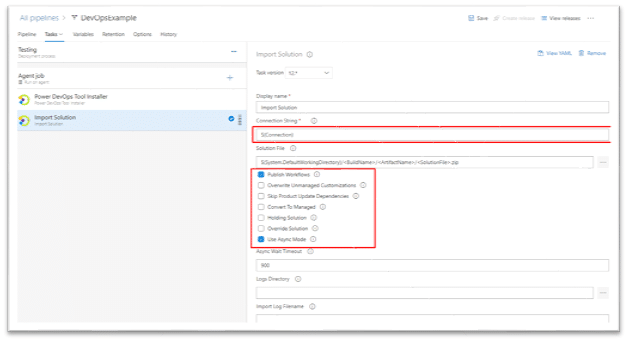
- Configure Import Solution
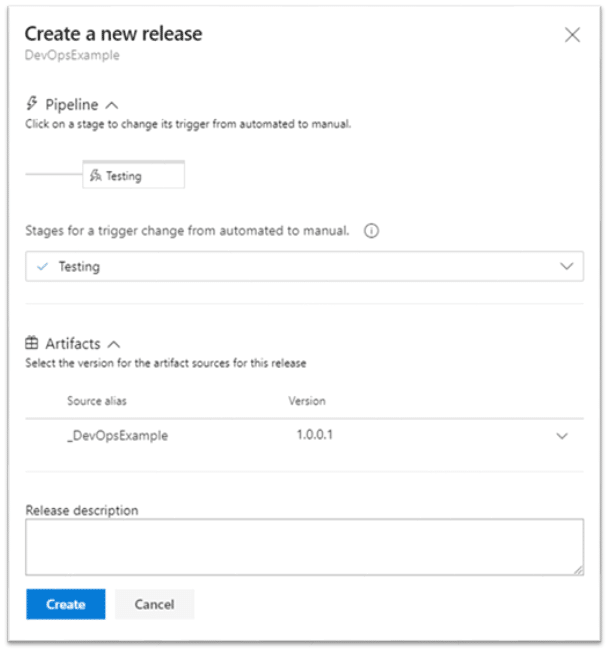
For Test – Click on Create Release -> Click on [Create] Button
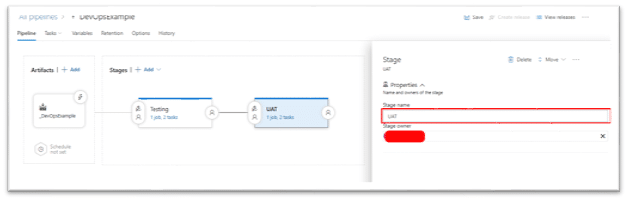
- Configure the UAT Environment in Release : à Click on Clone.
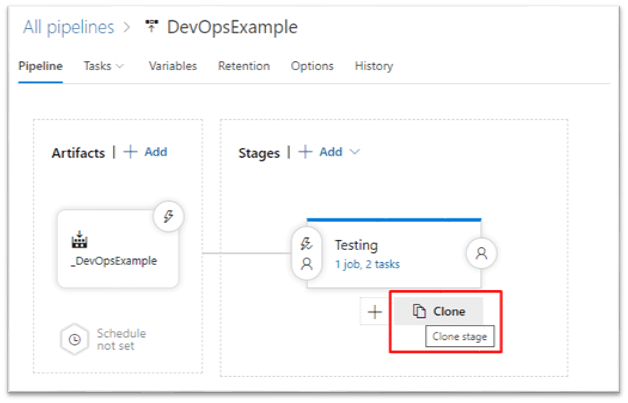
- Rename it with UAT -> Click on Save.
Hope this article is useful.
Cynoteck is a Microsoft Gold Partner and Power Platform Partner. With our knowledge across the Microsoft Stack, we build solutions that best fit your needs. We help you identify and utilize your organizational data to the best which lets you make intelligent decisions for your growth.
Connect our team if you are interested in implementing Power Platform in your business.
Microsoft Power Platform Consulting
Still, have a question? You are free to contact me or other experts in our team to showcase the real power of PowerApps to you.


Very Helpful blog