
In this blog tutorial we will learn step by step process to create our first canvas app using Excel as our data source from OneDrive for business.
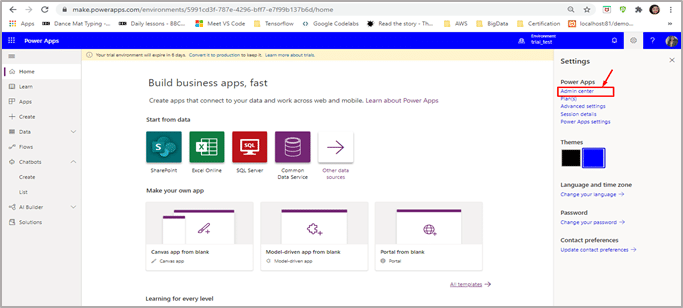
- Firstly, we will create a trial environment to create a canvas app https://admin.powerplatform.microsoft.com/environments/. To do so, from the settings click on the admin center on the right
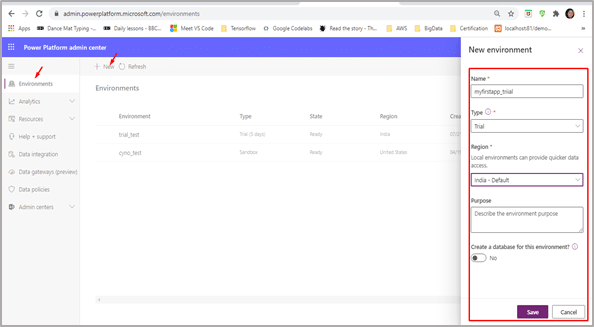
- It will open another window of Power Platform admin center. On the right, from the menu click on the Environment. Click NEW, a form will appear. Fill in the details, In the Type input box from the dropdown select Trial and click save.
- Create an Excel file with Employee records like first name, last name, email ID, Date of birth, Date of joining, Salary etc. Format that data as a table, named EmployeeDetails.
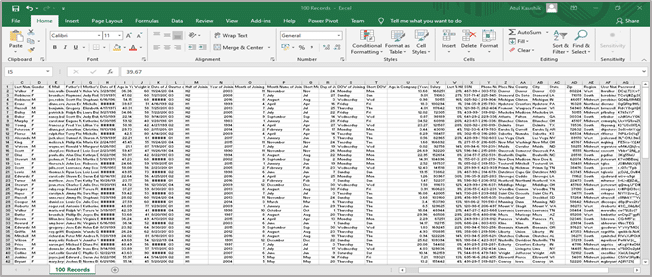
- Save the file with the name of Employee records.xlsx, close it and upload it to cloud storage account like in this case OneDrive.
- Now sign into Power Apps.
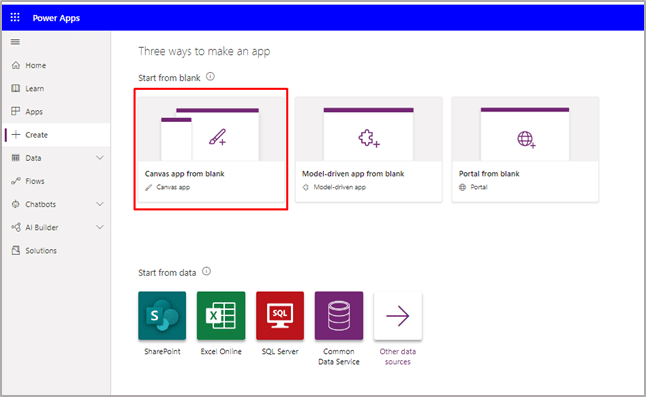
- On the left-hand menu click on create, that will open 3 ways to create an app screen i.e Canvas app from blank, Model-driven from blank, Portal from blank.
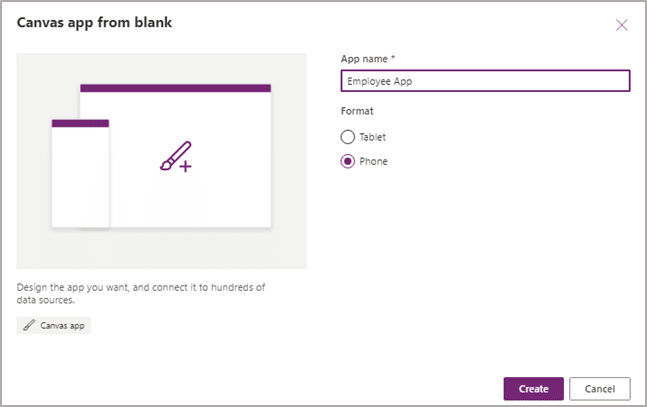
- Select Canvas app from blank to create an app
- Mention the name for your app, select Phone layout and then select Create
- If a dialog box showing Welcome to Power Apps Studio appears, select Skip
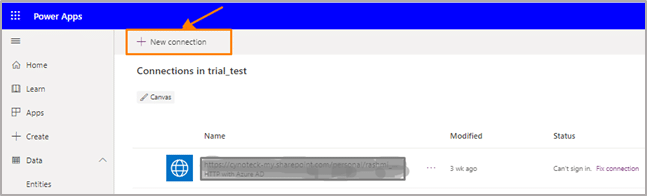
- On the left side menu click on Data, and select New connection, select the cloud-storage in this case OneDrive for your data and click Create, provide your credentials, if asked.
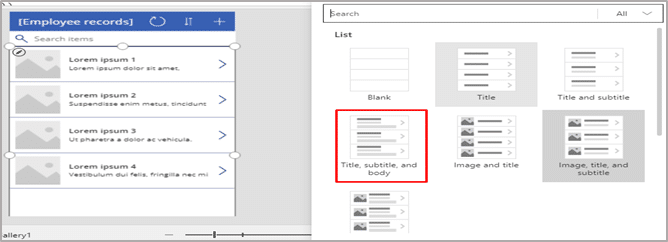
- From the top navigation menu on the Home tab click New screen dropdown and it will display all screen types, choose List. A new screen is added with several default controls like Gallery control, search box, label. The Gallery covers the entire screen under the search box.
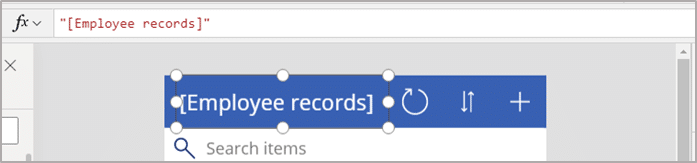
- In the new screen on the top left corner, select the Label control, and then replace [Title] with Employee records.
- Under Tree view, in the left navigation bar select BrowseGallery1. A selection box with handles surrounds the gallery.
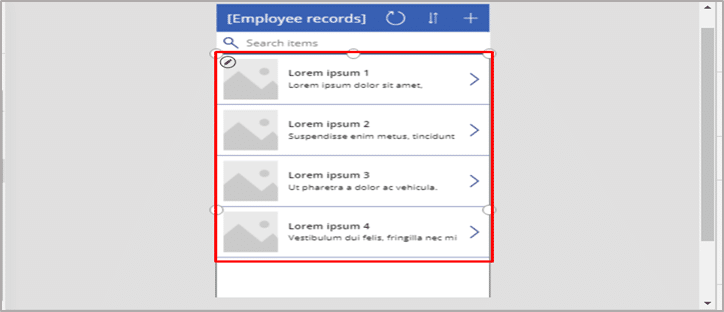
- On the right-hand pane, under Properties tab, select the dropdown arrow for the Layout, it will display different layout. Select Title, subtitle and body
- In the BrowseGallery1, on the top dropdown input box, select Items and in the formula bar, replace CustomGallerySample with EmployeeDetails and replace sampleText with First Name, last name, Employee ID and mail in first instance and with Email ID in second instance.

- On the right-hand side pane, under Properties tab, select Edit next to the Fields label.
- In the Body1 box, select Employee ID, in the Subtitle2 box, select Last Name, and in the Title2 box, select First Name.
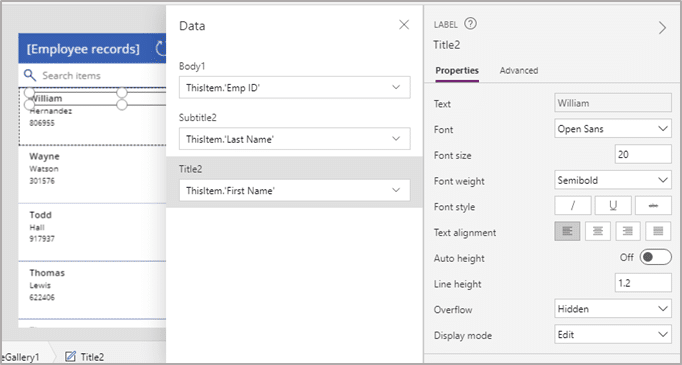
- In the upper-right corner of the Data pane, select the close icon (X) to close it.
Also, read: Setting the Default Mode for Forms in Canvas App (Power Apps)
Note: SortByColumns and Search functions in the formula bar are used to sort and filter the items in the gallery.
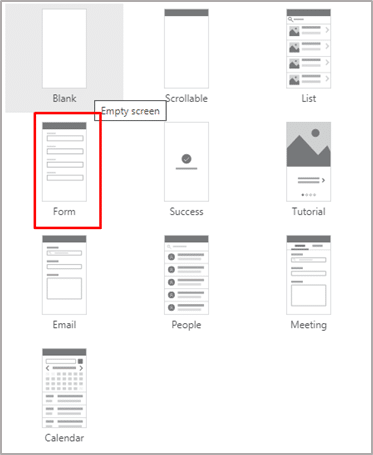
- Next step is to create the change screen by selecting the drop-down arrow next to New screen under the Home tab, and then select Form
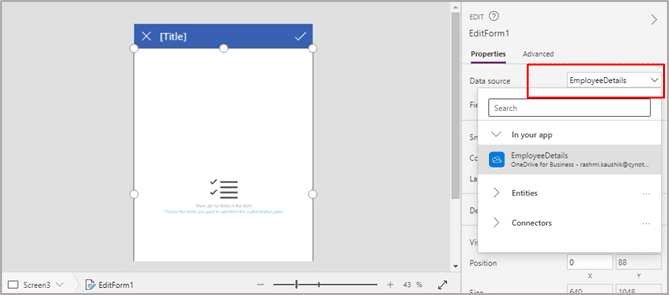
- Select EditForm1 from the left navigation bar
- On the right-hand pane, under the Property tab, select the drop-down arrow next to Data source, and then select EmployeeDetails from the list that appears.
- Under the data source, in the Fields label, select Edit Fields
- In the Fields pane, select Add field, select the check box for each field, and then select Add.
- Change the position of the field by collapsing the arrow given next to the name of each field, and then drag the fields in the order required.
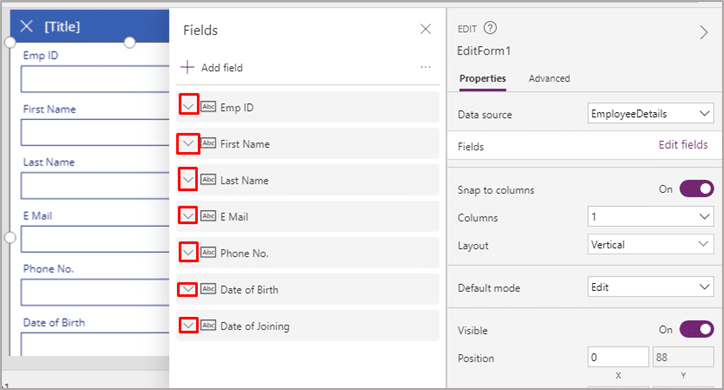
- In the upper-right corner of the Fields pane, close it by selecting the close icon (X).
- In the formula bar of EditForm1, set Item property to BrowseGallery1.Selected.
- At the top of the screen, select the Label control, and then replace [Title] with Edit details.
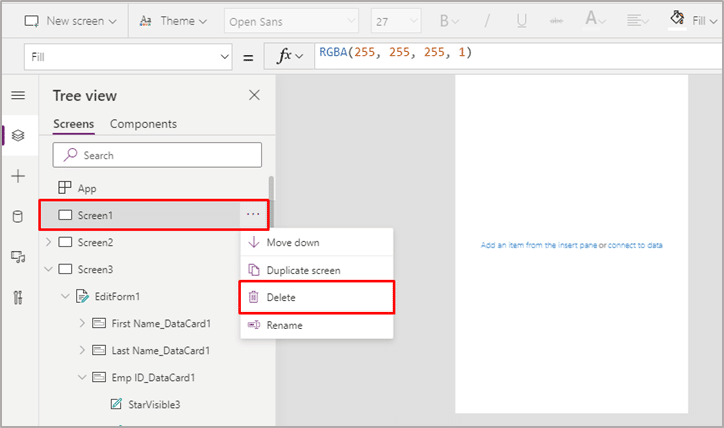
- To delete and rename the screen, select the ellipsis (…) from the left navigation.
- For screen1, select the ellipsis (…), and then select Delete.
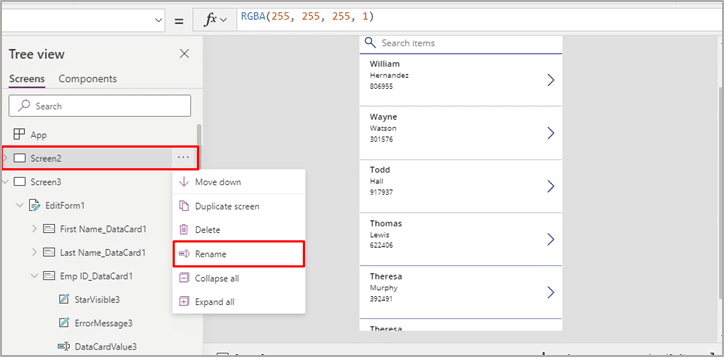
- For Screen2, select the ellipsis (…) and select Rename, and then type orpaste ViewScreen.
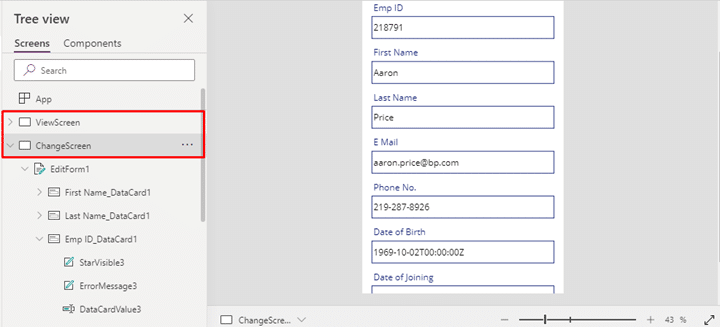
- Change the name of Screen3 to ChangeScreen also in the similar way as the Screen2.
Configure icon on the ViewScreen
- Near the top of the ViewScreen, select the circular-arrow icon.
- Set the OnSelect property for that icon in the formula bar to
Refresh(EmployeeDetails)
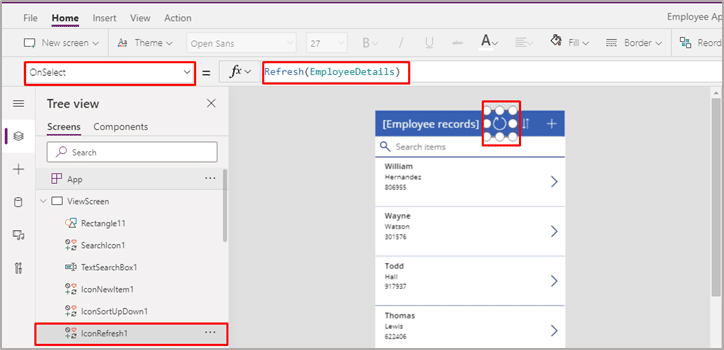
- When the user selects this icon, the data from
EmployeeDetailsis refreshed from the Excel file. - Select the plus icon (+) from the upper right corner of the ViewScreen and set the OnSelect property to NewForm(EditForm1);Navigate(ChangeScreen,ScreenTransition.None)
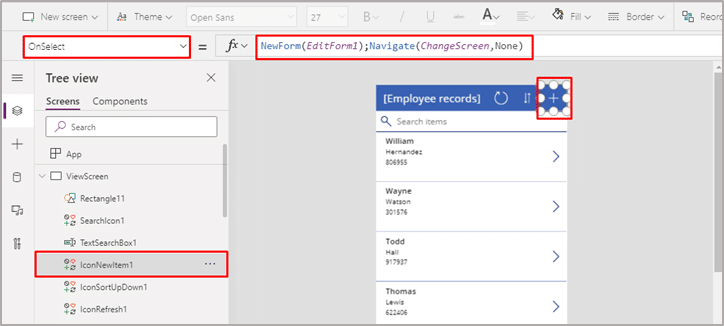
- When the user selects this icon, ChangeScreen appears with empty fields, so that the user can easily create a record.
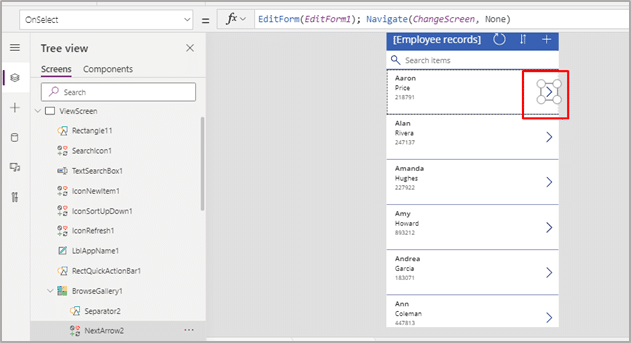
- Select the right-pointing arrow for the first record in the gallery. Set the OnSelect property for the arrow to this formula: EditForm(EditForm1); Navigate(ChangeScreen, ScreenTransition.None).
- When the user selects this icon, ChangeScreen appears with each field showing the data for the selected record, so that the user can edit or delete the record more easily.
Configure icons on the ChangeScreen:
- On ChangeScreen, in the upper-left corner select the “X” icon.
- Set the OnSelect property for that icon in the formula bar to ResetForm(EditForm1);Navigate(ViewScreen, ScreenTransition.None)
- When the user selects this icon, any changes that the user made in this screen are discarded, and the view screen opens.
- In the upper-right corner, select the checkmark icon.
- Set the OnSelect property for that icon in the formula bar to ResetForm(EditForm1);Navigate(ViewScreen, ScreenTransition.None)
- When the user selects this icon, any changes that the user made is this screen are saved, and the view screen opens.
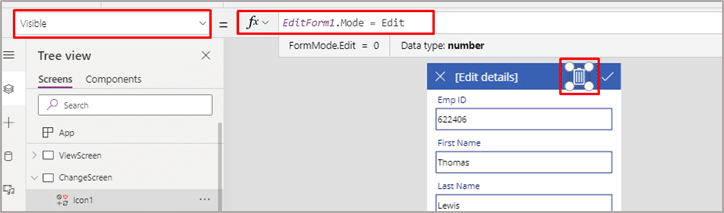
- On the Insert tab, select Icons, and then select the Trash icon. Set the Color property to White and position it next to the checkmark icon.

- Set the Visible property for the trash icon to EditForm1.Mode = FormMode.Edit, so that the icon appears only in the Edit mode and not in New mode
- Set the OnSelect property for the trash icon to this formula: Remove(EmployeeDetails,BrowseGallery1.Selected);Navigate(ViewScreen,ScreenTransition.None)
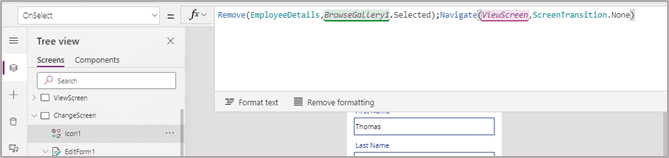
- When the user selects this icon, the selected record is deleted from the data source, and the view screen opens.
- Finally, you can test the app. Select the ViewScreen and then open Preview by selection the Preview icon near the upper right corner or by pressing F5.
- Type or paste one or more letters in the search box to filter the list based on the First name, Last name, email ID.
- Select the sort icon one or more time to show data in the ascending or descending order.
- Create, update, or delete the record.
- Close Preview mode by pressing Esc or by clicking on close icon
- Lastly press Ctrl-S to save the app in the cloud to run it from other devices.
Also, read: Microsoft Power Apps: Canvas apps vs Model-driven apps
Following the above steps, you can easily create a Canvas app from Excel data source.
Cynoteck is a Microsoft Gold Partner and Power Platform Partner. With our knowledge across the Microsoft Stack, we build solutions that best fit your needs. We help you identify and utilize your organizational data to the best which lets you make intelligent decisions for your growth.
Connect our team if you are interested in implementing Power Platform in your business.
Microsoft Power Platform Consulting
Still, have a question? You are free to contact me or other experts in our team to showcase the real power of PowerApps to you.