Abhishek Singh, a seasoned Project Manager, leverages Microsoft technologies to drive project success and foster business growth. As a Senior Tech Lead at Cynoteck, he brings over a decade of experience, primarily in Microsoft Stack technologies, with a 13+ year career in software development, specializing in Dynamics 365 and the .NET Framework. Abhishek holds multiple Read More
We are Microsoft Gold partner with its presence across the United States and India. We are a dynamic and professional IT services provider that serves enterprises and startups, helping them meet the challenges of the global economy. We offer services in the area of CRM Consultation and implementation, Application development, Mobile application development, Web development & Offshore Development.
Adobe Sign for Microsoft Dynamics 365 CRM integration Guide
Want to get your documents signed digitally from within your instance?
Here is the solution!
Adobe Sign allows a plug-and-play integration solution with Microsoft Dynamics CRM. This integration provides the following benefits:
Accelerates the process of quote-to-cash by sending agreements—such as sales documents and contracts — from Dynamics with just one click.
Automatically merges data from Dynamics entities—such as contacts and accounts — into agreements and pushes data back to the Dynamics 365, gathered from signers during the signing process.
Provides a simple and easy way for recipients to sign anywhere, anytime, on any device
Makes it possible to track documents sent out for signature from within Dynamics 365
Eliminates manual steps across the entire process.
Installation
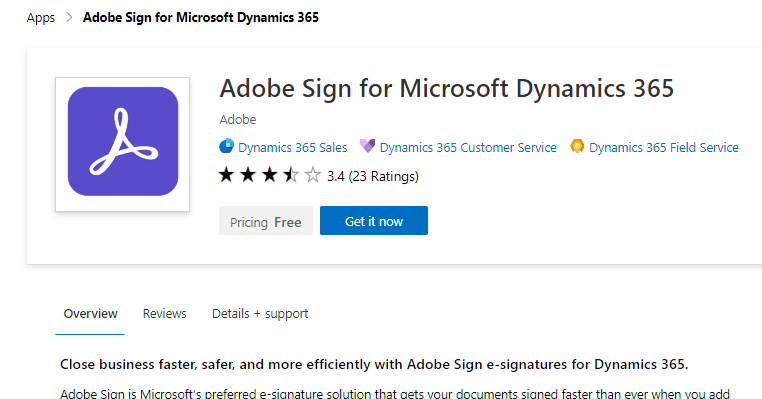
The online version of Adobe sign can easily get from Microsoft AppSource.
Adobe Sign for Microsoft Dynamics CRM
Click on Get it now.
It will ask you for the profile information and your consent for the same. Check the checkboxes and let’s go ahead.
Select the appropriate instance of Dynamics 365 wherein you would like to install Adobe sign.
You have installed the Adobe sign solution in your instance successfully and one new area of Adobe sign will also be added to your sitemap.
Adobe Sign Configuration
Let’s connect your Adobe sign account with your Dynamics 365 instance.
Every new installation needs an integration key to be generated in Adobe Sign and then saved in Dynamics 365. This key works as the access token to authenticate the Dynamics 365 and Adobe Sign environments to trust each other and share content. To generate an Integration Key in Adobe Sign:
Log in to your administrative user for your Adobe Sign account
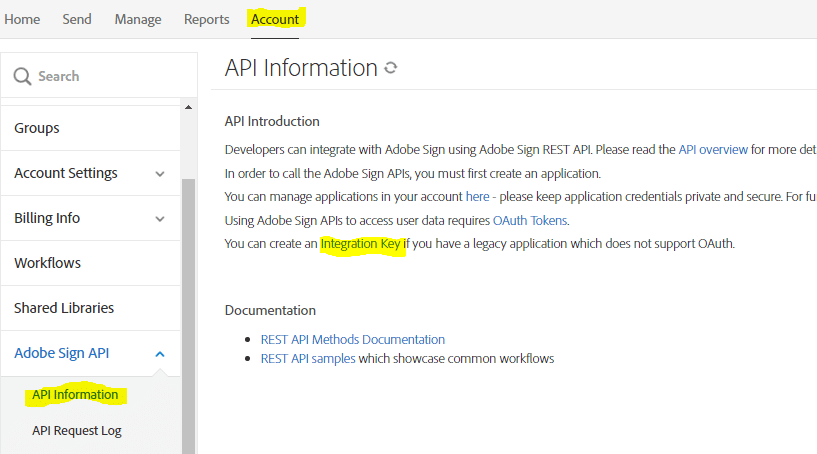
Navigate to Account > Adobe Sign API > API Information
Click the Integration Key link in the middle of the page.
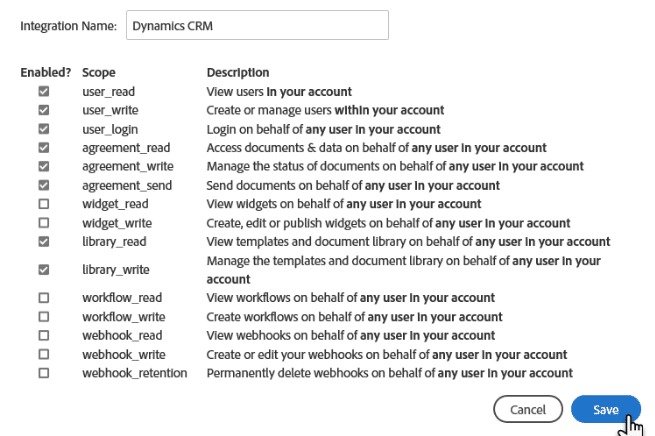
Once you click the Integration link, an interface will be opened to create the key.
Provide the Integration name and enable the permissions as per the below image:
Hit Save.
The Access Token page will appear showing the key for your account.
Click on the Integration key and copy the key.
You are done with the Adobe Sign account. Let’s go to our Dynamics 365 instance.
Log in with your administrative account to the Dynamics 365 instance.
Navigate to Adobe Sign Area > Admin Settings
On Admin Settings page:
Paste your key into the Integration Key field
Click Validate Key in the ribbon
Once your key gets validated, the Validate Key button will not be there, and the Remove Key button will be added to the ribbon.
Enable Activity Feeds on Adobe Agreement entity
Enable the activity feed for the Adobe Agreement entity to get all the performed events related to any agreement on the Post section of the respective entity such as Account, Contact, and more.
Navigate to Settings > Activity Feeds Configuration
The Post Configurations page loads:
1. Click Refresh to make sure that all configurations are loaded
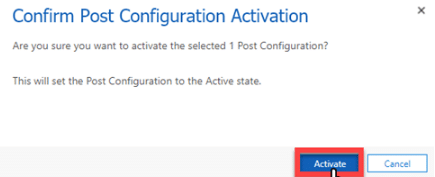
2. Single click the adobe agreement record to select it, and then click Activate
Click Activate to Confirm.
And here you have done with your required Configuration steps.
Working with Adobe Agreements
For sending agreements from within dynamics 365, we need to perform the following steps:
Create Data Mapping
Create Agreement Template
Let’s dive-in.
Create Data Mapping
Let’s assume you would like to send an Agreement to your customers from Account records. To accomplish this, we first need to create a Data Mapping.
Navigate to Adobe Sign Area > Click on Data Mapping entity
Create a new Mapping record by clicking on New on Ribbon.
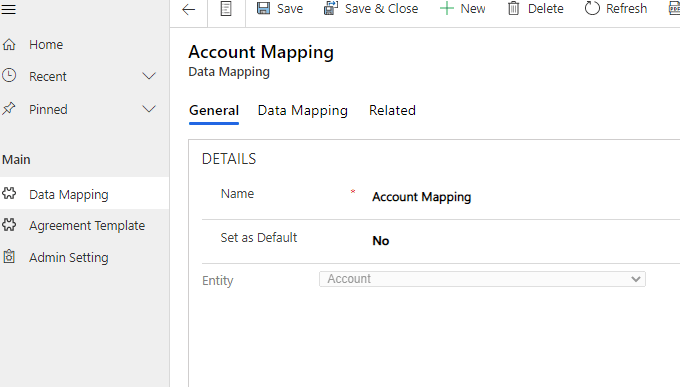
In the General tab, fill in the required information such as the Name of mapping and select the Target entity as the image below:
Click on the Data Mapping tab.
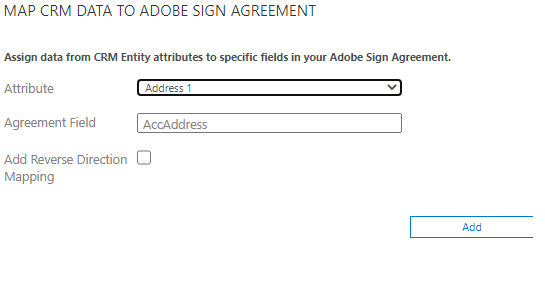
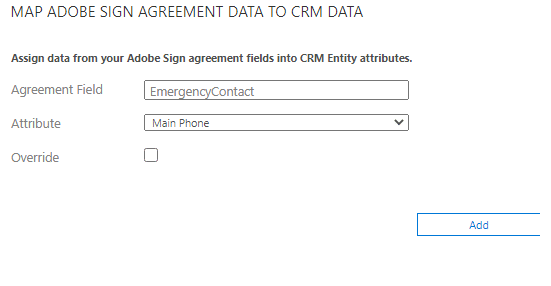
Here, you need to provide the field mapping. Select the CRM entity field and map it to your agreement field.
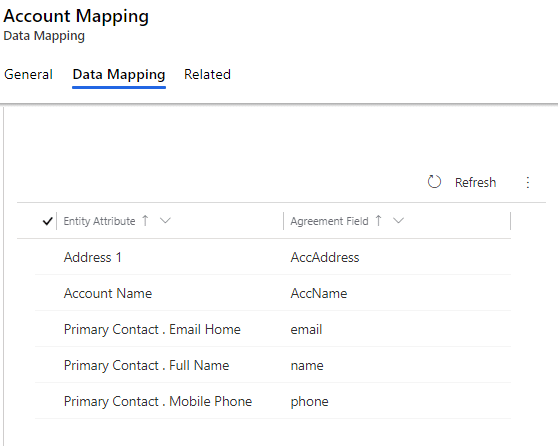
Once mapped, it will look like this:
If you would like to map any Agreement field back to Dynamics field, that needs to be configured in the same Data Mapping record as following:
For creating the Agreement template, follow the following steps:
Navigate to the Agreement Template entity and Click New to create a new Agreement template.
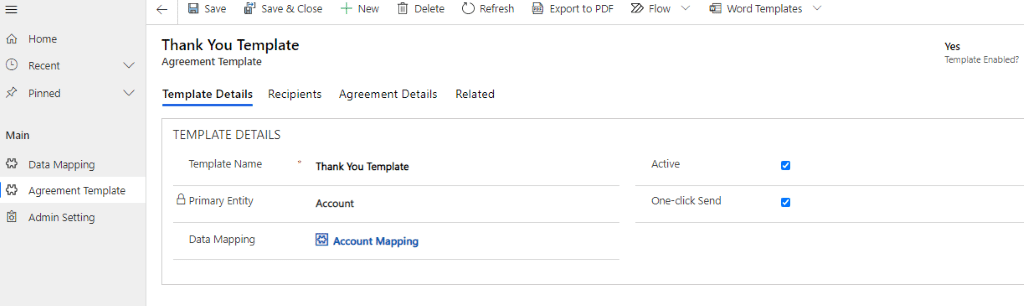
Fill in the template name and target entity (Account in our example).
Once you fill in these two details, some Processing will be displayed for a while, and you will be prompted with more fields to fill.
Select the previously created Data Mapping in the Data Mapping field.
Check the Active checkbox to Activate your template.
Check the One-Click checkbox to reduce one step at the time of sending the agreement from the record. (Will cover later)
Once you fill all the details, it will look like this:
Hit Save.
Move to Recipients Tab and add your agreement recipient. You can add a custom recipient or from the related entity.
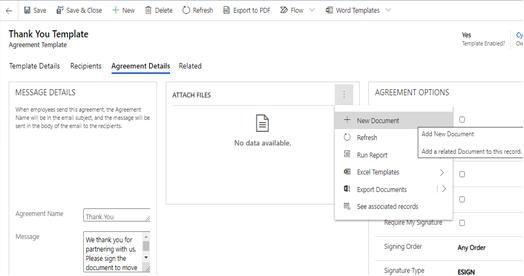
Coming to the third Tab, here we need to upload our agreement template and set the message that we want our recipients to see at the time of signing the document.
Along with it, we can set other settings such as Signing Order, the Signature Type and Preview before sending for Signature and likewise.
Once all these steps are done, we are ready to send the Agreement from the Account record.
Sending the Agreement
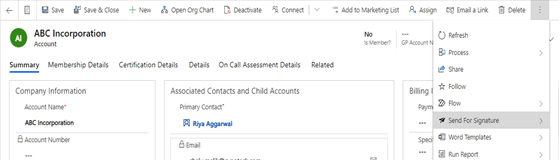
Navigate to the Target entity. It’s Account in our example.
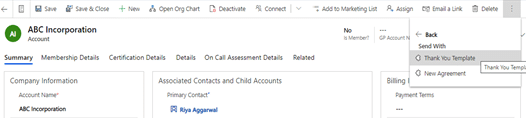
Open any record and click on ellipses (…), Click on Send for Signature button.
Select the template you want to send.
Clicking on the Template, Adobe Sign will automatically send it to the recipients as defined in Agreement Template.
If we have unchecked the One-Click field on Agreement Template, it will redirect us to Agreement Page after Clicking the Template from the Account record, and we will have Click Send button again on the Agreement record.
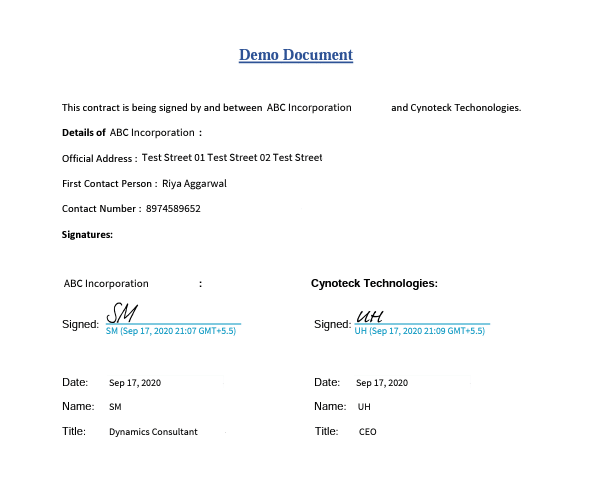
Once all the parties sign the Agreement, Adobe sign will inform all the parties about the signed Agreement via mail. Adobe will attach the Agreement as pdf with mail for all the parties to keep track.
Once signed by all the parties, the agreement looks like this,
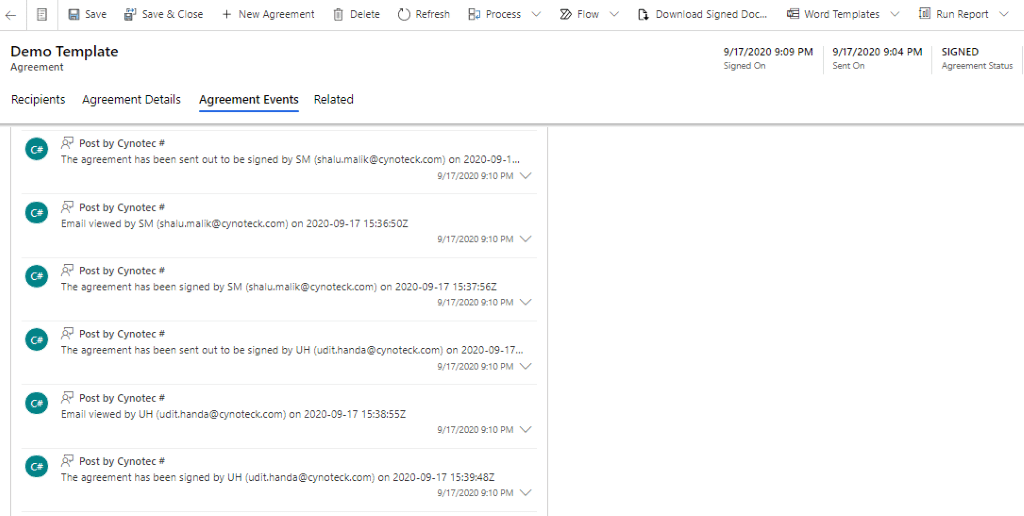
Every single event related to Agreement sending and signing can easily be tracked in Dynamics 365 Agreement record as:
Following all the above steps, we have successfully sent an Agreement Template from within our Dynamics 365 Instance.
Want to get your documents signed digitally from within your instance?
Here is the solution!
Adobe Sign allows a plug-and-play integration solution with Microsoft Dynamics CRM. This integration provides the following benefits:
Accelerates the process of quote-to-cash by sending agreements—such as sales documents and contracts — from Dynamics with just one click.
Automatically merges data from Dynamics entities—such as contacts and accounts — into agreements and pushes data back to the Dynamics 365, gathered from signers during the signing process.
Provides a simple and easy way for recipients to sign anywhere, anytime, on any device
Makes it possible to track documents sent out for signature from within Dynamics 365
Eliminates manual steps across the entire process.
The online version of Adobe sign can easily get from Microsoft AppSource.
Adobe Sign for Microsoft Dynamics CRM
Click on Get it now.
It will ask you for the profile information and your consent for the same. Check the checkboxes and let’s go ahead.
Select the appropriate instance of Dynamics 365 wherein you would like to install Adobe sign.
You have installed the Adobe sign solution in your instance successfully and one new area of Adobe sign will also be added to your sitemap.
Adobe Sign Configuration
Let’s connect your Adobe sign account with your Dynamics 365 instance.
Every new installation needs an integration key to be generated in Adobe Sign and then saved in Dynamics 365. This key works as the access token to authenticate the Dynamics 365 and Adobe Sign environments to trust each other and share content. To generate an Integration Key in Adobe Sign:
Log in to your administrative user for your Adobe Sign account
Navigate to Account > Adobe Sign API > API Information
Click the Integration Key link in the middle of the page.
Once you click the Integration link, an interface will be opened to create the key.
Provide the Integration name and enable the permissions as per the below image:
Hit Save.
The Access Token page will appear showing the key for your account.
Click on the Integration key and copy the key.
You are done with the Adobe Sign account. Let’s go to our Dynamics 365 instance.
Log in with your administrative account to the Dynamics 365 instance.
Navigate to Adobe Sign Area > Admin Settings
On Admin Settings page:
Paste your key into the Integration Key field
Click Validate Key in the ribbon
Once your key gets validated, the Validate Key button will not be there, and the Remove Key button will be added to the ribbon.
Enable Activity Feeds on Adobe Agreement entity
Enable the activity feed for the Adobe Agreement entity to get all the performed events related to any agreement on the Post section of the respective entity such as Account, Contact, and more.
Navigate to Settings > Activity Feeds Configuration
The Post Configurations page loads:
1. Click Refresh to make sure that all configurations are loaded
2. Single click the adobe agreement record to select it, and then click Activate
Click Activate to Confirm.
And here you have done with your required Configuration steps.
Working with Adobe Agreements
For sending agreements from within dynamics 365, we need to perform the following steps:
Create Data Mapping
Create Agreement Template
Let’s dive-in.
Create Data Mapping
Let’s assume you would like to send an Agreement to your customers from Account records. To accomplish this, we first need to create a Data Mapping.
Navigate to Adobe Sign Area > Click on Data Mapping entity
Create a new Mapping record by clicking on New on Ribbon.
In the General tab, fill in the required information such as the Name of mapping and select the Target entity as the image below:
Click on the Data Mapping tab.
Here, you need to provide the field mapping. Select the CRM entity field and map it to your agreement field.
Once mapped, it will look like this:
If you would like to map any Agreement field back to Dynamics field, that needs to be configured in the same Data Mapping record as following:
For creating the Agreement template, follow the following steps:
Navigate to the Agreement Template entity and Click New to create a new Agreement template.
Fill in the template name and target entity (Account in our example).
Once you fill in these two details, some Processing will be displayed for a while, and you will be prompted with more fields to fill.
Select the previously created Data Mapping in the Data Mapping field.
Check the Active checkbox to Activate your template.
Check the One-Click checkbox to reduce one step at the time of sending the agreement from the record. (Will cover later)
Once you fill all the details, it will look like this:
Hit Save.
Move to Recipients Tab and add your agreement recipient. You can add a custom recipient or from the related entity.
Coming to the third Tab, here we need to upload our agreement template and set the message that we want our recipients to see at the time of signing the document.
Along with it, we can set other settings such as Signing Order, the Signature Type and Preview before sending for Signature and likewise.
Once all these steps are done, we are ready to send the Agreement from the Account record.
Sending the Agreement
Navigate to the Target entity. It’s Account in our example.
Open any record and click on ellipses (…), Click on Send for Signature button.
Select the template you want to send.
Clicking on the Template, Adobe Sign will automatically send it to the recipients as defined in Agreement Template.
If we have unchecked the One-Click field on Agreement Template, it will redirect us to Agreement Page after Clicking the Template from the Account record, and we will have Click Send button again on the Agreement record.
Once all the parties sign the Agreement, Adobe sign will inform all the parties about the signed Agreement via mail. Adobe will attach the Agreement as pdf with mail for all the parties to keep track.
Once signed by all the parties, the agreement looks like this,
Every single event related to Agreement sending and signing can easily be tracked in Dynamics 365 Agreement record as:
Following all the above steps, we have successfully sent an Agreement Template from within our Dynamics 365 Instance.
Cynoteck Technology is a leading expert on Microsoft Dynamics 365 and we provide an array of Dynamics 365 Consulting Services to all size of businesses. Get in touch with us for latest updates on Dynamics 365.


Good Blog, Can we customize the Signature button